

How to Crochet a Pointed Oval. Part 1 - Foundation chain and rotate

Oval series
How to crochet an oval
How to crochet an ovoid - foundation chain and crochet around (part 1)
How to crochet an ovoid - treble bobble crochet (part 2)
How to crochet a pointed oval - foundation chain and rotate (part 1)
How to crochet a pointed oval - foundation chain with varying heights (part 2)
How to crochet a pointed oval - using tall stitches (part 3)
How to crochet a pointed oval - using Magic ring (part 4)
How to crochet a biconvex (3D pointed oval)
So I came up with 4 different ways to come up with a flat pointed oval shape or an elliptoid shape. Here I will be covering the 1st of those 4 methods. It’s great for creating all kinds of Amigurumi attachments like long ears or leaves.

How to crochet a pointed oval - foundation chain and rotate
The pattern is as follows: Row 1: Ch9 Row 2: Sc2, hdc1, dc2, hdc1, sc2, go around chain Row 3: Sc2, hdc1, dc2, hdc1, sc2
Check out the full video tutorial at the bottom of this blog post for easier reference if it helps.
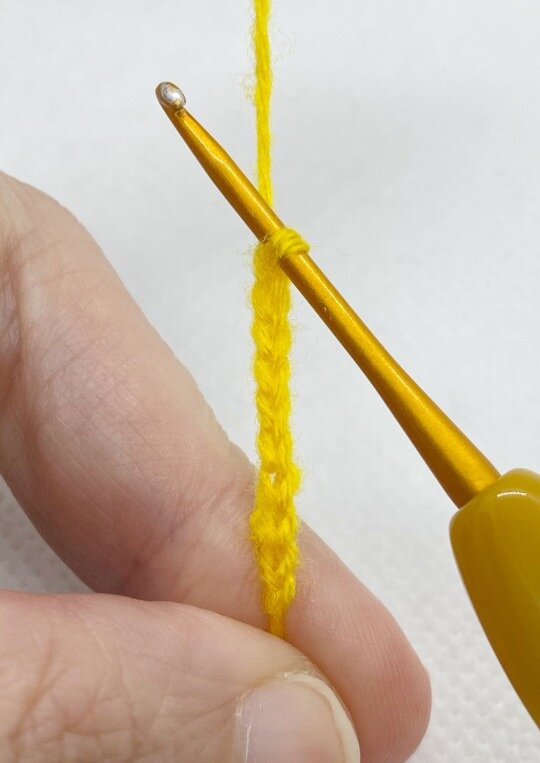
Step 1) Creating the basic foundation chain
This is mostly basic when you start off with a slip knot and make a whole foundation chain. In this example, I made ch9, which I have named as the first row.
Row 1: Ch9
If you are unsure of how to make basic crochet stitches like slip knot or foundation chain, you can check out my free 30-page ebook on how to do this.
Step 2) Crochet along the foundation chain
What you choose to crochet along the foundation chain is up to you, based on what the patterns says or whichever shape you would like to conjure up.
In this case, I’m starting with a single crochet of 2 (sc2) to start off with, in row 2.

Step 3) Complete until the end of the row
To complete this first row along the foundation chain, I have named it row 2. To create a taller effect in the middle and narrower effect at the ends, I have used single crochet at ends and half double and double crochet in middle.
Row 2: Sc2, hdc1, dc2, hdc1, sc2, go around chain

Step 4) Rotate the whole row!
So you see the part where I mentioned to go around the chain - it refers to the arrows in the pictures above.
In the top 2 images, the foundation chain part is at the bottom, while in 3rd image, it’s on the left and in the last picture, the foundation chain part has gone to the top.
Step 5) Continue crocheting on the other side of the foundation chain
As I mentioned earlier, the foundation chain part is now facing upwards and you can continue to crochet on the other half of the foundation chain.
In this case, as we continue crocheting on the other side of the row, I have named it row 3.

Row 3: Sc2, hdc1, dc2, hdc1, sc2
It’s essentially the same as row 2, to create a symmetrical side, identical to the original row on the foundation chain.

The final piece! It consists of the foundation chain, the first row crocheted on and then the subsequent row crocheted on the other side!

You can see how this method can be used to make leaves or ears. I have done this for my Rabbit from Winnie the Pooh and also my past rabbits like Peter Rabbit.

My latest Looney Tunes collection showcasing this method can be seen in Bugs Bunny and Wile Coyote!

Do share or pin this tutorial if you found it useful so others can see it too!

Stay tuned for the 2nd method to create these pointed ovals and how I incorporated them into my Amigurumi! See my other youtube video tutorials and subscribe if you think they are useful!

Discover how easy toy design can be! The free Amigurumi Shaping Starter Guide shows you how every toy is built from simple 2D and 3D shapes — and walks you through a clear 5-step process for turning those shapes into your very own customized designs.