

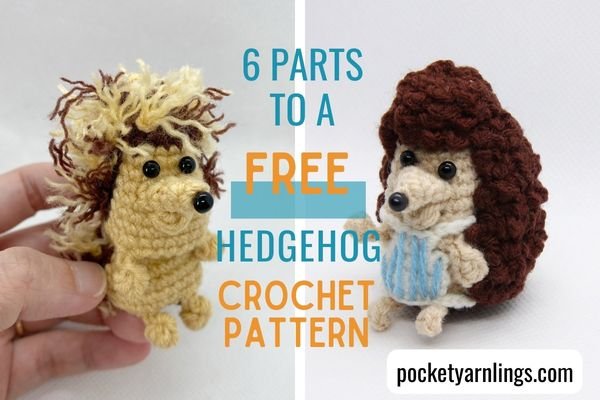
6 parts to a Free Hedgehog Crochet Pattern
Thinking about how to crochet a hedgehog pattern? Here is a free easy crochet hedgehog pattern below, broken up into individual sections to make it easier to follow along. Coupled together with the free Pumpkin pattern here, they would make a cute mini set for a little one to play with…
We will be going through how to crochet the head, body, limbs, snout and face together with their assembly.
There are affiliate links in this post. We will receive a commission if you make a purchase through our affiliate link at no extra cost to you. Do note I have used some if not most of these products at some point in time.
Table of Contents Show
How do you crochet a simple hedgehog?
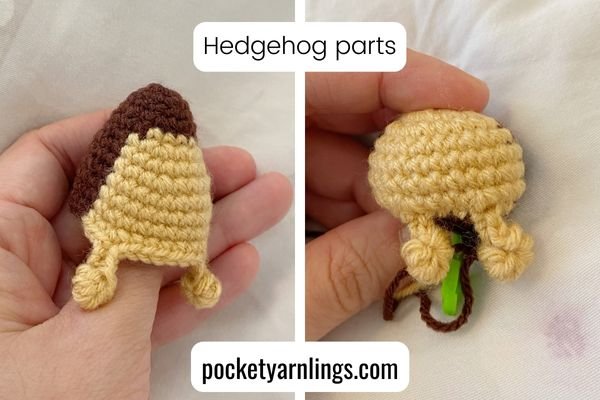
To crochet a simple hedgehog, there are quite a few parts involved. For a start as a basic amigurumi crocheter, you might want to crochet each part first and then bring it all together at the end.
These part include crocheting the hedgehog head, the body, the snout, the back quills and a little bit at the end which is a pumpkin which comes along with the hedgehog!

How do you crochet a hedgehog for beginners?
In this pattern, we will be crocheting the head component first and then move onto the body part separately. They can be combined together into one unit or made separately and interchangeable between the head, body and a little pumpkin, by using magnets! I will be explaining more about it later down below.
Terminology
Ch = chain
Sl st = slip stitch
St = stitch (refers to number of stitches in one round)
2sc1 = single crochet increase (meaning 2 single crochet in same stitch)
Sc2tog1 = single crochet decrease (referring to invisible decrease)
Bobble stitch = 4 double crochet bobble (4dc bob)
Yarn over, insert hook in indicated st, yarn over, pull up loop, yarn over, draw through 2 loops, (yarn over, insert hook in same st, yarn over, pull through 2 loops) 3 times, yarn over, pull through 5 loops on hook
Surface sc = surface single crochet
holding working yarn behind piece, hook in front of piece, insert hook through piece, yo, pull yarn through piece, proceed to sc
Materials and Tools
2.5mm Clover crochet hook
Orion Top Deluxe Yarn, Crown Yarn (or any equivalent acrylic yarn) - light brown, dark brown
Darning needle
Stitch markers
Filling – use leftover yarn or polyester fibrefill
Scissors
4mm glass eyes or safety eyes
Recycled white cloth
See how they look like and my selection for my amigurumis just below.
Also check out my full list of commonly used crochet tools and accessories here.
Now that you have gathered your supplies and had a look at the basic terminology to reading the following pattern, let us first get started on crocheting the head!
Yarn
Orion Top Deluxe Yarn, Crown Yarn (or any equivalent acrylic yarn) - light brown, dark brown

Crochet hook
2.5-3.0mm Clover crochet hook

Stuffing
Use leftover yarn or polyester fibrefill
Safety Eyes
4mm glass eyes or safety eyes

Stitch Markers
Plastic stitch markers or metal stitch markers

How to crochet a Hedgehog Head?
Rnd 1: Magic ring sc6 (dark brown) — 6st
Rnd 2: 2sc6 (dark brown) — 12st
Rnd 3: Sc12 (dark brown) — 12st
Rnd 4: (Sc1, 2sc1) x 6 (all dark brown) — 18st
Rnd 5: Sc7 (dark brown), sc5 (light brown), sc6 (dark brown) — 18st
Rnd 6: Sc2 (dark brown), 2sc1 (dark brown), sc2 (dark brown), 2sc1 (dark brown), sc2 (light brown), 2sc1 (light brown), sc2 (light brown), 2sc1 (light brown), sc1 (light brown), sc1 (dark brown), 2sc1 (dark brown), sc2 (dark brown), 2sc1 (dark brown) — 24st
Rnd 7: Sc8 (dark brown), sc9 (light brown), sc7 (dark brown) — 24st
Rnd 8: Sc3 (dark brown), 2sc1 (dark brown), sc3 (dark brown), 2sc1 (dark brown), sc3 (light brown), 2sc1 (light brown), sc3 (light brown), 2sc1 (light brown), sc1 (light brown), sc2 (dark brown), 2sc1 (dark brown), sc3 (dark brown), 2sc1 (dark brown) — 30st
Rnd 9: Sc10 (dark brown), sc11 (light brown), sc9 (dark brown) — 30st
Rnd 10-11: Repeat round 9 — 30st
Rnd 12: Sc10 (dark brown), sc2 (light brown), (sc1, ch6, 3dc bob in 3rd ch from hook, sl st 3, sc1) (all light brown) 1st arm made, sc5 (light brown), (sc1, ch6, 3dc bob in 3rd ch from hook, sl st 3, sc1) (all light brown) 2nd arm made,sc2 (light brown), sc9 (dark brown) — 32st
Rnd 13 (separate piece):
Magic ring sc10 (light brown) – 10st
2sc10 (light brown) – 20st
(Sc1, 2sc1) x 3 (dark brown), sc1 (dark brown), 2sc1 (light brown), (sc1, 2sc1) x 3 (light brown), (sc1, 2sc1) x 3 (dark brown) – 30st
To join up to Round 12 using whipstitch, skip the 2 legs
How do I join Hedgehog amigurumi head to body?
For this hedgehog example, I have made the head and body into 2 separate parts, that are joined together by magnetic placements.
Magnet Placement 1
When stuffing the body after Round 13 above, place a button magnet right at the bottom, just before sewing on round 12.
Magnet Placement 2
Place magnet at the top of the bottom hedgehog body piece below, just below Round 1 and 2 and continue crocheting in subsequent rounds.

How to crochet a Hedgehog Body?
Rnd 1: Magic ring sc10 (light brown) – 10st
Rnd 2: 2sc10 (light brown) – 20st
Rnd 3: (Sc1, 2sc1) x 3 (dark brown), sc1 (dark brown), 2sc1 (light brown), (sc1, 2sc1) x 3 (light brown), (sc1, 2sc1) x 3 (dark brown) – 30st
Rnd 4: Sc10 (dark brown), sc11 (light brown), sc9 (dark brown) – 30st
Rnd 5: Sc10 (dark brown), sc12 (light brown), sc8 (dark brown) — 30st
Rnd 6: Repeat round 15 — 30st
Rnd 7: Sc10 (dark brown), sc4 (light brown), (sc1, ch6, 3dc bob in 3rd ch from hook, sl st 3, sc1) (all light brown) 1st arm made, sc3 (light brown), (sc1, ch6, 3dc bob in 3rd ch from hook, sl st 3, sc1) (all light brown) 2nd arm made, sc3 (light brown), sc8 (dark brown) — 32st
Rnd 8: (Sc1, sc2tog1) x 5, skip 1 st after right leg, sc1, sc2tog1, sc1 before left leg, skip 1 st after left leg, sc2tog1, (sc1, sc2tog1) x 3 – 20st
Rnd 9: Sc2tog10 (dark brown) — 10st
Rnd 10: Sc2tog5 (dark brown), close up in FLO – 5st

How to crochet a Hedgehog Snout?
Use light brown yarn to make the hedgehog snout.
Rnd 1: Magic ring sc3 — 3st
Rnd 2: Sc1, 2sc1, sc1 — 4st
Rnd 3: (Sc1, 2sc1) x 2 — 6st
Rnd 4: (Sc1, 2sc1) x 3 — 9st
Then flatten it (no need for stuffing).
Use a single glass eye as a nose pin.
Hedgehog’s Lower Lips
Use light brown yarn to make lower lips.
Magic ring sc4 — 4st
Don’t join up to form a circle, instead, form a semi-circle to make into a smile.
How to crochet Hedgehog back Quills or Spikes?
Method 1: Using loop and hook
Insert hook where want hair attached down.
Loop folded strand of yarn around the hook.
Draw yarn through st.
Hook both strands through the loop on the hook and then pull out all the way.
Method 2: Using direct surface crochet
Using brown yarn alone,
Surface sc on top of head then ch2, sc1 down 1st st.
Then sl st onto next main ch on head.
Continue around in a circle, only over the dark brown parts of the body.
How to sew the crochet Hedgehog parts together?
Attach snout with the lower lip just below it.
Add in the single nose pin as mentioned earlier.
Attach a pair of glass eyes above snout and glue it down using hot glue.
Conclusion of crocheting a Hedgehog amigurumi
Apart from laying out a free hedgehog pattern, I talked separately about how to crochet a hedgehog head, a hedghog body, the hedgehog snout and face detailing and ended off with assembly work. So what did you think - was this layout useful? Let me know in the comments below.


To check out more of my ideas for using various types of crochet stitch techniques to shape amigurumi, grab my free Amigurumi Shaping Starter Guide below! Inside, get 10 quick ideas on how to get started on shaping new amigurumis of your own!
Hello Spring Hop Bundle

The Hello Spring Hop Bundle consists of a total of 31 patterns which includes:
6 garment patterns
6 amigurumi patterns ← with mine inside!
7 wearable accessory patterns
12 homeware & bag patterns
Here is a summary of all the techniques and patterns available inside this bundle, which is only available until the end of March!
Grab the whole bundle below at a heavily discounted price of $14.99 and save $117!

Over!
〰️
Over! 〰️

Over!
〰️
Over! 〰️
Related articles
How do you Crochet Different Shapes in Amigurumi?
14 useful things you need to know about How to Crochet a Circle
8 extraordinary ways on How to Crochet an Oval Pattern
6 important things to know about Bobble Stitch Crochet
12 creative ways on How to Join Crochet Pieces Together
The 3 quick systematic steps involved in How to End a Crochet Project