

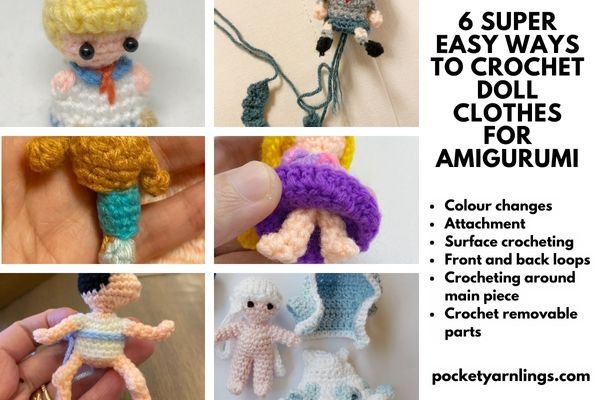
6 super easy ways to Crochet Doll Clothes for Amigurumi (including Dresses)!
Crocheting doll clothes can be a way to personalize or customize your amigurumi doll. There are many different types of clothes that you can crochet including swimsuits, dresses, t-shirts, pants, jackets or coats, jumpsuits, overalls and hoods.
For the purposes of this articles, I will be outlining 6 basic simple varying techniques to crochet doll clothes in reference to 8 inch amigurumi dolls. Using the same crocheting techniques, you can adapt them to fit larger or smaller amigurumi dolls.
The 6 techniques to making doll clothes include the following:
Crochet colour changes in amigurumi
Attach crochet clothes to amigurumi
Surface crocheting on the main amigurumi
Crocheting into the front and back loops of the amigurumi
Crocheting around the main amigurumi piece
Crochet separate changeable and removable small doll clothes
In each short segment, I will go through how each technique can be used to create crochet clothes for dolls. In these cases, the clothes are made for amigurumi crocheted bodies, not plastic doll bodies, thought to mention that first.
Before you get started on these different techniques for crocheting mini doll clothes, you might want to check out ‘3 Easy Techniques on How to Make a Crochet Doll Body (no sew included!)’ to think about ideas on crocheting the doll body first!
Table of Contents Show
How to crochet colour change in amigurumi to make clothes?
We will start off with the easiest technique which is basically crocheting colour changes in the bottom half of the amigurumi body, as compared to the top half, to simulate the appearance of pants or dresses.
Even though this is the easiest method, it has much less detailing as you will see below. Also, it does not differentiate between what kind of clothes are in the bottom half of body.
This is the easiest way to get started on crocheting the appearance of clothes, instead of crocheting a full beige body, add in some colour changes so that it looks like they are wearing some clothing.

I have the simple example for the boy and girl above. As you can see, there are colour changes between the arms, legs and the top half and bottom halves of the body. Creating a border or belt can be a form of demarcation between the top and bottom.
The pattern for the boy on the left (or Fred actually) is available here for free.
Specifically on how to learn crochet colour changes especially in amigurumi, check out this blog post below on the all the steps involved. It is actually really simple, for the dolls above, I changed the colours between the bobble stitches which were used for the arms and legs.

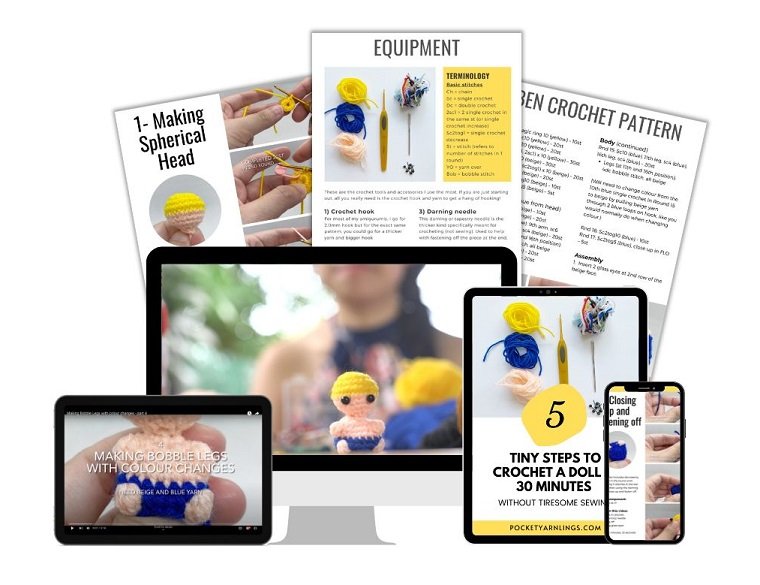
If you still do not quite get what I mean in the example above with Fred, here is a little free guidebook with a crochet pattern inside, along with some crochet-a-long videos, totally free to sign up for. In this case we will be crocheting a little boy in a small pants swimsuit. The guidebook is titled ‘5 tiny steps to crochet a doll in 30 minutes’!
To go even further on what I mentioned above, if you crochet individual limb attachments, crocheting colour changes will also help with no just demarcating the top and bottom halves of the body, you could use it to demarcate sleeves and pants length as well, like what is shown below here.
As you can see, I did include some layering over the amigurumi for the coat and hood but the base body is actually one continuous stitch made up of many different colour changes, some for the sleeves on arm and some for the shoes on the feet.

How do you attach amigurumi clothes?
Along the same lines of crocheting different colours as mentioned above, this is the next natural step to create more clothes detailing. Here I will be giving an example of making a small skirt.
For the base girl’s body, I crocheted colour changes like I suggested above and then I moved onto crocheting a separate small skirt, and then finally attaching it onto the main body.

The skirt involves crocheting in rows rather than in a round for it to be attached on. First make the base amigurumi body without the skirt attachment and then with the mini skirt sewed on subsequently as seen in the image above.
For the skirt attachment to the main body, you could either use whip stitch or mattress stitch technique. As for how these different techniques are involved in attaching amigurumi pieces together by sewing and assembly work, check out this post below on attaching hair to amigurumi head because I used the exact same techniques in many parts of the amigurumi!

Remember that using this technique to make the clothes for the bottom half of the body would mean crocheting in rows rather than rounds so take that into consideration when you are coming up with the pattern.

Free 10-minute training!
If you are more interested in exploring finding out more about how to use these 6 methods to crochet doll clothes, there is this free 10 minute training which you can join in below! Or if you prefer watching a video training instead of reading!
How to surface crochet on amigurumi to create clothes?
Surface crocheting involves using a new set of yarn to crochet on another separate surface, whether it be a full or partial amigurumi body, or even an incomplete piece.
Surface crocheting is a great way to put amigurumi pieces together without having to do sewing. Like how you could do it for limbs, you could similarly do something like this for creating skirts or dresses.
By using this surface crocheting technique, you could crochet on different types of skirt or even pants appearances onto the main amigurumi body just like I did here:
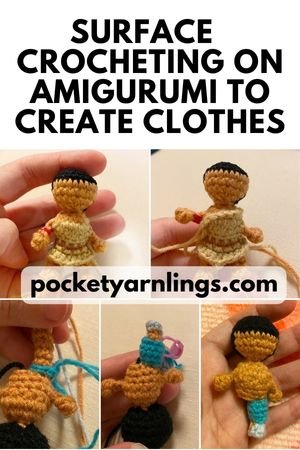
Surface crocheting also means layering which is great for making dresses, you could make use of the next technique below, then layer on top with surface crochet and top it off with sewing another layer right on top!
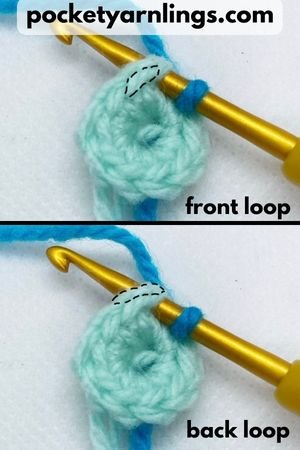
How do you crochet front and back loops in amigurumi for making doll clothes?
Using this technique is pretty similar to the previous one on using surface crocheting but instead, this time we will be working into front and back loops of the round separately. Usually for the regular amigurumi body, you would be crocheting into both loops throughout.
This is the example of the front and back loops, you can see the traced out area for the FLO on top and BLO below respectively:
I mostly make use of the back loops to crochet the legs and the front loops to crochet the clothes portion. Here is an example of what I mean:

Which technically means that there is no sewing involved because I continuously crochet in a round either in the FLO or BLO. Usually I crochet continuously into the back loops leaving the front loops empty. Then I surface crochet onto the front loops to create the dress or skirt.
Doing the reverse is difficult, crocheting first into front loops downwards and then trying to find the unused back loops inside can be hard.
As for the different kinds of skirt you can create from there, you can check out this blog post on how to create a ruffled or rip looking appearance of the skirt trimmings:

Pin image below if you found this article useful!

How to crochet around an amigurumi?
Now using this method of crocheting clothes would also mean that it is not removable from the clothes, which is sometimes the effect we want. After completing the main amigurumi body, start with a new yarn and crochet a chain around the main body.
Join one end of chain to the other end to form a round, then continue downwards in a round. Move onto making a dress or pants or whichever clothes you intended on the body itself. So it ends up looking like one crochet layer wrapped around another.
Something looking like this set of overalls where the top part involves colour changes while the bottom part involves crocheting around the amigurumi.
This definitely has better detailing than simply changing colours and the appearance can look much like that for the surface crocheted version. I also did it for the teepee animal set below as well. They all have jumpsuit appearances from crocheting around the main amigurumi body.

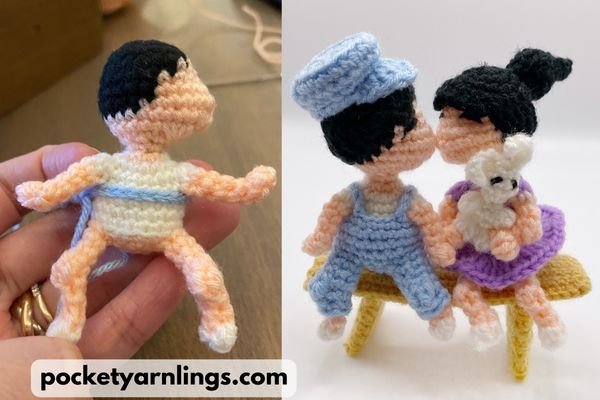
How do you crochet small doll clothes for dress up?
This has to be the most versatile method and probably the most fun because you can mix and match or change up the clothes. You can make it such that your kids can interchange the different types of clothes since it is removable.
Using this method means you would have the make the clothes larger in the round, as compared with the main amigurumi body. Also to make it easier to remove the clothes from the body, the top parts must be made looser than the bottom.

In this case I’m going to use the example of this little boy and girl, which was in a recent crochet-a-long I organized. You can see the individual components for the boy includes his body, hat, jacket, tshirt and pants, where for the girl is her body, dress and hooded jacket. So with the base body, you could crochet mainly different types of doll clothes to mix and match with the base.
If you are more interested in exploring finding out more about how to use these 6 methods to crochet doll clothes, there is this free 30 minute webinar training which you can join in below! Or if you prefer watching a video instead of reading the whole blog article, then this training is for you!
Free 10-minute training!
If you are more interested in exploring finding out more about how to use these 6 methods to crochet doll clothes, there is this free 10 minute training which you can join in here! Or if you prefer watching a video training instead of reading!
Conclusion
There you have it, 6 simple ways to get cracking on crocheting doll clothes with amigurumi. They include changing colours, sewing on separate attachments, surface crocheting, working into FLO/ BLO loops, crocheting around main amigurumi body and finally making separate clothes for dress up!
Mixing up different techniques for making doll clothes can make them look special and unique and easier to personalize. What do you think of these techniques, let me know in the comments below and remember to share this if you found it useful!
What’s Next
🧵 How to Crochet Dolls: 7 Key Techniques for Body, Head, Hair & Clothes »
Your complete parent guide—learn all the core components of doll-making in one place.
👗 How to Crochet a Mini Rippling Skirt »
Learn an easy ripple technique to add movement and flair to your doll’s outfit.
🎨 85 Crochet Amigurumi Doll Patterns and Designs to easily get started with »
Explore a big collection of beginner-friendly and character dolls for instant inspiration.