

24 Easy Peasy things you need to know about Magic Ring in Crochet
Struggling with starting off your amigurumi, especially with the dreaded magic ring? There are a few ways to tackle it and a few different types of stitches to master. Or if you want to try alternatives to crocheting magic rings, here are some ideas below as well. You could say this whole article is a crochet magic ring for dummies guide!
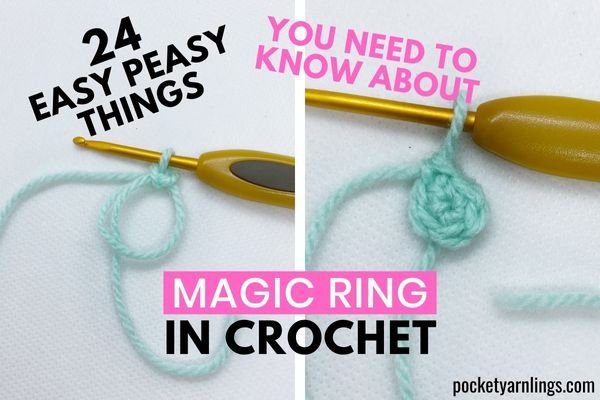
Table of Contents Show
What is a magic ring in crochet?
Let's start with the basics first. A magic ring is a crochet technique to transform a string of yarn into a small circle with an adjustable hole in the middle.
It is the most versatile way to start off making a circle because with this technique, you are able to adjust and close up the hole in the centre, making it a 'magic' ring!
Is a magic circle the same as a magic ring?
Yes, the terms magic ring and magic circle are interchangeable. They are called that because the stray yarn end can be pulled taut, making the ring or circle in the middle shut tight 'magically'.
Is an adjustable ring the same as a magic ring in crochet?
Along the same lines, it is also named adjustable ring aptly because you can adjust the size of the circle in the middle to different diameters.
How do you crochet a magic ring for beginners?
Here I showed 3 different ways to crochet a magic ring, starting with what I use the most. I named them the 'pinch and flip' method, the 'criss cross' method and the classical method. Most would use the classical way but I find the pinch and flip the easiest to follow.
What is the easiest way to make a magic circle in crochet?
Let us start off with trying the 'pinch and flip' method. It involves crossing the yarn at the start, using the right hand to pinch the yarn on the left hand, then finally flipping the yarn on the left hand.
How do you start a crochet magic circle?
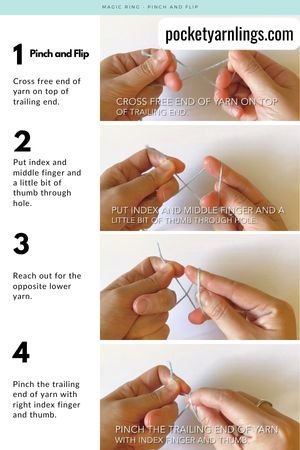
Pinch and Flip Method
Here I will be going through how to do a magic ring crochet step by step instructions.
1) Cross the free end of yarn on top of trailing end.
2) Put index and middle finger and a little bit of thumb through hole.
3) Reach out for the opposite lower yarn.
4) Pinch the trailing end of yarn with right index finger and thumb.
5) Pull pinched part through hole.
6) Flip free end and trailing ends of yarn on left hand between index and middle fingers.
7) Pinch down small loop on right hand between index finger and thumb, so the position doesn't move.
8) Transfer pinched loop to left hand so right hand is free to insert hook.
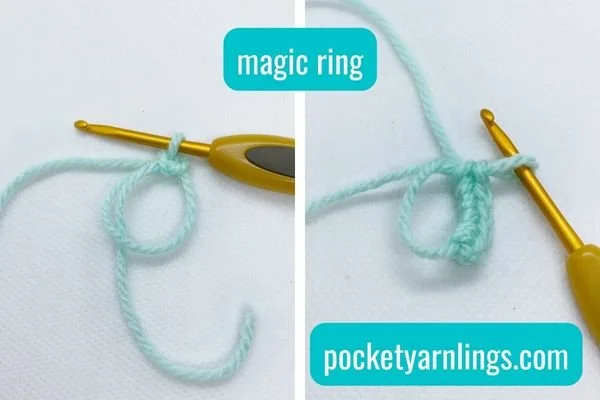
9) Yarn over and pull through loop on hook to form chain 1.

Do you count first stitch on magic ring?
This part where you form chain 1 does not count as the first stitch. Only with the next few steps 10-12 with the single crochet stitch done is that considered the first stitch.
10) Continue single crocheting into the centre of the loop.
How do you close a hole in a magic circle?
11) Pull free end of yarn to make the centre loop smaller and close up.
12) Continue crocheting into the middle loop until the desired number of stitches, for example 5 single crochet stitches.

How do you secure a magic ring?
13) After closing up the loop, to secure the magic ring, continue into the second round, either using a single crochet stitch or a slip stitch.
Do you slip stitch in magic ring?
You could finish up the magic circle in the second round by either using a slip stitch, which makes it flatter, or using a single crochet stitch to continue into an amigurumi subsequently.
Check out how to crochet the magic ring in slow motion inside this magic ring video below, where I ended off with a single crochet.
What other ways to crochet a circle with a magic circle?
The other 2 remaining ways to try crocheting a magic ring like I mentioned was the 'criss cross' and 'classical methods'. Here I have also included the magic ring crochet tutorials below for both.
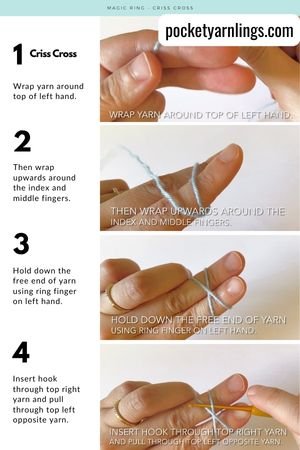
Criss Cross Method
1) Wrap yarn around top of left hand.
2) Then wrap upwards around the index and middle fingers.
3) Hold down the free end of yarn using ring finger on left hand.
4) Insert hook through top right yarn and pull through top left opposite yarn.
5) Should have 1 loop on hook.
6) Yarn over top left yarn again and pull through loop on hook to form chain 1.
7) Pulling through loop on hook.
8) Pull out fingers from left hand out of the loop.

9) Position trailing yarn on top and free end of yarn at bottom.
10) Proceed to single crochet into centre of loop.
11) Pull on free end of yarn to close up loop.
12) Magic ring completed!

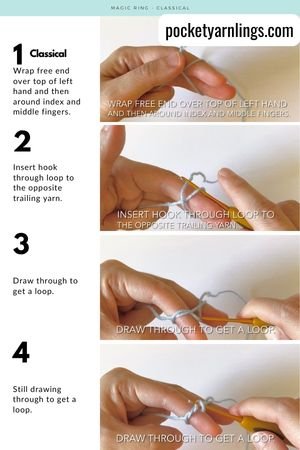
Classical method
1) Wrap free end over top of left hand and then around index and middle fingers.
2) Insert hook through loop to the opposite trailing yarn.
3) Draw through to get a loop.
4) Continue drawing through to get a loop.
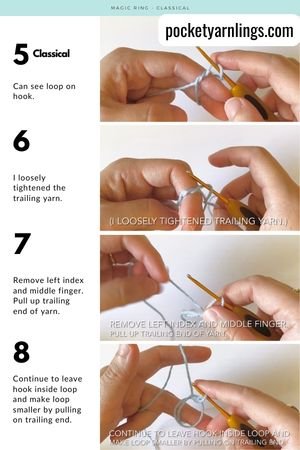
5) You will get one loop on the hook.
6) (Loosely tighten the trailing yarn.)
7) Remove left index and middle finger. Pull up trailing end of yarn.
8) Continue to leave hook inside loop and make loop smaller by pulling on trailing end.
9) Yarn over and pull through loop on hook to form a chain 1.
10) Proceed to single crochet into the centre of the loop.
11) Pull on the free end of yarn again to close up the magic ring.
12) Magic ring completed!

Before you dive into your first stitches, make sure you’ve got a solid foundation to follow. My 77-page Amigurumi Foundation eBook walks you through every step — from tools and yarns to shaping your first toy — and it’s completely free right now (usually $17!).

💡 Want to learn all the basics of crocheting amigurumi in one place?
Grab my free 77-page Amigurumi Foundation eBook — your complete step-by-step guide to mastering tools, stitches, and beginner toy techniques (normally $17!).
Is a magic ring always 6 stitches?
A magic ring can start off with any number of stitches, here I am referring to single crochet stitches for now. Later on, I will move onto taller stitches. Most crocheters start off with a magic ring of 6 stitches (or 6 sc in magic ring) because it creates a nice closed up magic circle with no hole in the centre, and turns out fairly flat.
How big should a magic circle be?
Another way of asking this is how many stitches can you put in a magic ring? As I mentioned just above, a great number to start off with is 6 sc in magic ring.
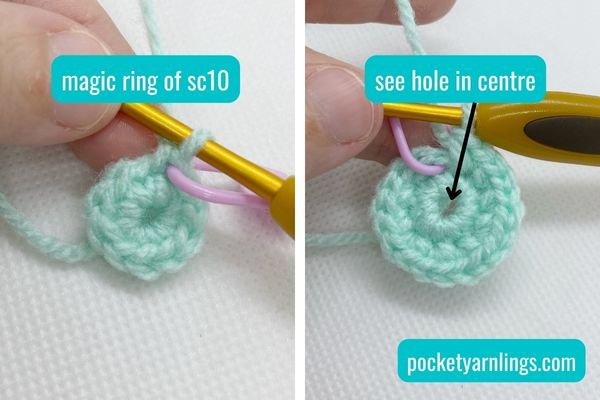
Starting with a smaller number of stitches like 3 will end up making the start of your amigurumi pointy while starting with a larger number like 10 may make your magic circle have a big hole in the middle.
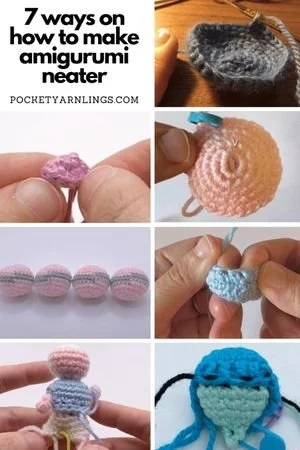
For more tips like this on how to make your amigurumi neater, check out this article called '7 Useful Ways on How to Make Amigurumi Neater?'
How do you count stitches in a magic circle?
When counting the stitches in a magic circle, much like a round, you could refer to the front and back loops as a single stitch. To make the counting easier, especially when entering the second round and the stitches are more difficult to keep track off, make use of stitch markers to keep count.
To learn more about counting stitches in rounds, rows, chain and all about how I make use of stitch markers to keep track of my stitches, check out this post on '10 Crochet Stitch Marker Types and their 10 easy Uses in Amigurumi'.
If you find this article useful, remember to pin to Pinterest and share it!
Different crochet stitches inside of magic ring
This section is about crocheting different types of stitches inside of the magic ring. The above examples have all been about adding single crochet stitches to a magic ring. Sometimes, you might choose to start off with a taller stitch to get a flatter and bigger circle. See the examples below to understand what I mean.
How do you add a single crochet to a magic ring?
Insert hook into the centre of the loop, yarn over, pull up a loop, yarn over again, then finally draw through the 2 loops on the hook. This forms a standard simple single crochet but this time into a magic circle. All the examples above are using single crochet stitches.

How do you make a half double crochet magic ring?
Like how you would normally do a half double crochet stitch, yarn over first, then insert the hook into the centre of the loop, then pull up a loop, you should have 3 loops on the hook. Yarn over for final time, then draw yarn through all 3 loops on hook, to form the final hdc in the magic ring.

How do you make a double crochet magic ring?
To crochet a double crochet magic ring step by step, first start with yarn over, then insert the hook into the centre of the loop, then pull up a loop, to similarly get 3 loops on the hook. Yarn over again, draw yarn only through 2 (of 3) loops on hook, to get 2 loops left on hook. Then yarn over for final time, draw yarn through last 2 loops on hook, to form the final double crochet in the magic circle.
If you are not sure how to do basic crochet stitches like sc, hdc and dc, check out this comprehensive article, ‘How to Learn Basic Crochet Stitches step by step for Absolute Beginners - 6 Easy Steps!’.

Troubleshooting magic ring
Why is my magic ring not closing?
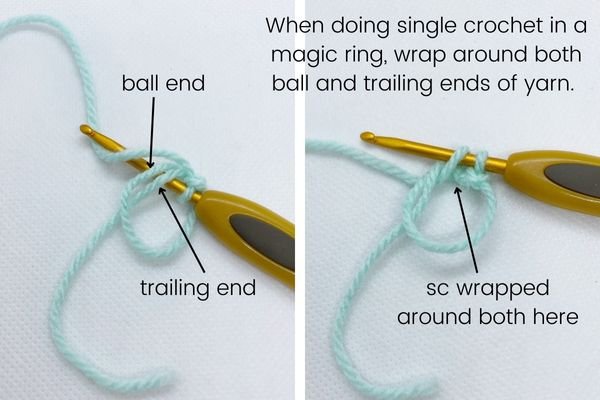
This is likely because when you insert the hook into the centre of the loop to proceed with crocheting stitches, you did not crochet around both ends of the yarn (free and trailing ends). This is also the same as asking why is my magic ring not tight. Read on for how to correct this.
How do I keep my magic ring tight?
When you insert into the centre of the loop to do a single crochet, you need to crochet around both the free and the trailing ends of the yarn. Only then will you be able to pull the free yarn end taut. Do not pull the trailing end of the yarn to close up the loop, it will not be adjustable.

How do you continue the magic circle?
Once you have successfully completed the initial magic ring, then the most difficult part is done! The subsequent rounds are worked into the stitches from the first round and usually involves increases, with the most basic being single crochet stitch increases. The 2nd round is usually increases, then the 3rd round alternate increases, then the 4th round involves increases every 2 stitches. I will mention more below in a short pattern.
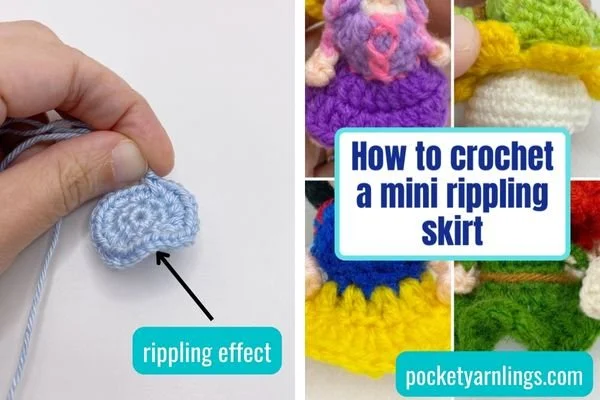
Why is my magic circle rippling?
This question actually refers to a magic circle after it has been continued into subsequent 2nd and 3rd rounds and so forth. The rippling might have occurred because the tension in crocheting the magic ring and the subsequent rounds were too tight or the increases in the 2nd round onwards are too many. This means you are squeezing too many single crochet in each stitch for the subsequent rounds.
How do you make a magic circle stay flat?
For the example below, 2 sc1 refers to an increase in single crochet stitch, so 2 sc6 refers to increase in single crochet stitch for the next 6 stitches.
A fairly standard and useful way to increase from a magic ring of 6 sc would be the following:
Round 1: Magic ring sc6 - 6st
Round 2: 2 sc6 - 12st
Round 3: (Sc1, 2 sc1) x 6 - 18st
Round 4: (Sc2, 2 sc1) x 6 - 24st
Round 5: (Sc3, 2 sc) x 6 - 30st
And so forth. So slowly increase the single crochet inside the brackets to get an even spacing throughout the rounds, so you can keep the magic circle flat and no longer rippling.

Alternatives to using a magic ring
What can I use instead of a magic circle in crochet?
If you have not managed to master the magic circle despite all the different ways mentioned above, do not fret, you can still try crocheting in rounds and even finish an amigurumi without using the magic ring.
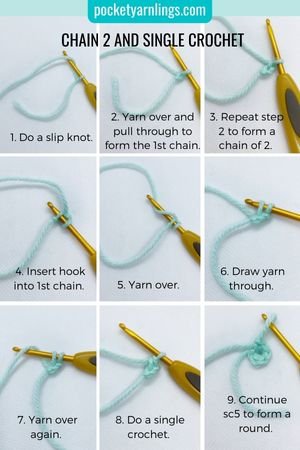
Instead, tie a slip knot first, then crochet a short chain of 2 stitches and then single crochet into the 2nd chain away from the hook. You can single crochet any number of stitches, depending on how big you want the initial circle to be. So for the same equivalent example above, you could do 5 single crochet stitches. The start of the pattern will go like this:
Chain 2.
Round 1: 5 sc into 2nd chain from hook - 5st
(Here I am referring to single crocheting 5 stitches into the 2nd chain from hook.)
This is the easier way to start off with and sometimes what beginner crocheters will start off with after mastering a slip knot and a foundation chain.
The downside of this method, compared with using a magic ring is that it does end up with a small gap in the centre and it is non-adjustable, and therefore 'non-magic' circle. Also, using this method to start off your amigurumi may result in an initial 'pointy' tip or amigurumi.
To see more ways on how to make your amigurumi neater, check out this article called '7 Useful Ways on How to Make Amigurumi Neater?'.
How do you join a ring in crochet chain?
This is a slight variation of the previous method above when you chain a longer foundation chain, instead of just chain 2. Then you join the 2 ends of the chain together with a slip stitch and then continue crocheting down the chain. For example, you could chain 10 stitches and then join end to end with a slip stitch. You would end up with an even bigger hole in the centre than the method above.

What does crochet around the foundation chain mean?
The last alternative to making a magic ring would be to try starting off in an oval instead of a circle instead! Similarly start off with a foundation chain, then single crochet down the chain, and then work into the opposite side of the chain.
Chain 4.
Round 1: Starting from 2nd ch from hook, sc2, 3sc1 in same last ch, go around, turning as you go, sc1 on other side, 2sc1 - 8st

This would create a flat 2D oval instead of a circle, which is great for creating other amigurumi appearances, and consider it an alternative to the magic ring. For more ways on how to crochet different shapes, go check out this article on 'How do you Crochet Different Shapes in Amigurumi?'.
Remember to share this article if you found it useful or Pin to Pinterest!
Conclusion
I hope this has been useful to show you 3 different ways to crochet a magic ring - pinch and flip, criss cross and classical methods. Always remember to crochet around both the free and trailing ends of the yarn. Consider experimenting with half double crochet and double crochet stitches into the magic ring as well. If you still cannot master it, try out some other chain alternatives to start off your amigurumi as well!
💭 Want to see how the Magic Ring fits into a full beginner toy project?
Check out 15 Steps to Crochet Amigurumi for Absolute Beginners »
It walks you through every stage — from tools and stitches to finishing your first handmade toy.
If you found this whole article useful and want the step by step details on the 3 different ways to crochet magic ring in pdf format, go ahead and grab the free download below. It is my free 45-paged cheat sheet on how to crochet for beginners step by step with pictures PDF download below. It is basically a beginner printable crochet stitch guide with free printable crochet instructions for complete beginners!
💡 Want to learn all the basics of crocheting amigurumi in one place?
Grab my free 77-page Amigurumi Foundation eBook — your complete step-by-step guide to mastering tools, stitches, and beginner toy techniques (normally $17!).
What’s Next
➕ 15 different detailed Ways on How to Increase in Crochet »
Learn how to expand your rounds and start shaping your first amigurumi base.
➖ 15 different detailed Ways on How to Decrease in Crochet »
Master how to narrow your shapes and close them neatly.
🧵 Front Loop and Back Loop in Crochet - the easy way to know everything »
Discover how working in different loops can create texture and dimension.