

Slip Stitch Crochet: A Comprehensive Beginner's Guide to Mastering the Technique
Slip stitch crochet is a popular technique used by many crocheters to create a variety of projects. This technique involves inserting the hook into a stitch, wrapping the yarn around the hook, and pulling the yarn through both the stitch and the loop on the hook. Slip stitch crochet is often used for joining pieces together, creating a decorative edge, or adding texture to a project.
One of the benefits of slip stitch crochet is its versatility. It can be used with any type of yarn and hook size and can create a range of different effects depending on how it is used. Slip stitch crochet can be used to create a dense, sturdy fabric or a more delicate, lacy effect. It can also be used to add colour and texture to a project, or to create a unique design element.
Table of Contents Show
What is slip stitch in crochet?
The slip stitch (sl st) is a basic stitch used in crochet. It is abbreviated as "sl st" in crochet patterns. A slip stitch is the shortest form of crochet stitch, even shorter in height than the most basic single crochet stitch.
What is slip stitch in crochet called?
I have seen a few different types of abbreviations for slip stitch, like sl st, ss, SLST. If you follow Craft Yarn Council, then the abbreviation is sl st. Although this does vary from pattern designer to pattern designer, so refer to the pattern terminology for their preference of writing.

Understanding Slip Stitch
Slip stitch crochet is a technique where you insert your hook into a stitch, yarn over, and pull through both the stitch and the loop on your hook. Slip stitches are commonly used to join rounds, create edging, and add texture to your crochet projects. They are also great for adding small details, such as eyes or buttons, to amigurumi or other stuffed toys.
Slip stitches are the shortest of all crochet stitches, and they create a dense, firm fabric. Slip stitches can be worked in the front loop only, the back loop only, or both loops, depending on the desired effect.
Tools Needed
To get started with slip stitch crochet, you will need a few basic tools:
Crochet hook: Slip stitches can be worked with any size hook, but a smaller hook will create a tighter fabric.
Yarn: Any weight of yarn can be used for slip stitch crochet, but a lighter weight yarn will create a more delicate fabric.
Scissors: You will need scissors to cut your yarn at the end of your project.
In addition to these basic tools, you may also want to use stitch markers to help keep track of your rounds or rows, and a tapestry needle to weave in your ends.
Now that you understand the basics of slip stitch crochet and have the necessary tools, you can start creating beautiful and unique crochet projects with this versatile stitch.
How do you do slip stitch in crochet?
First, we will talk about creating a slip knot, then making the first chain, before we can actually properly start mastering the slip stitch in crochet. We will go through each step subsequently in sequence below.
Starting a Slip Stitch Crochet
Creating a Slip Knot
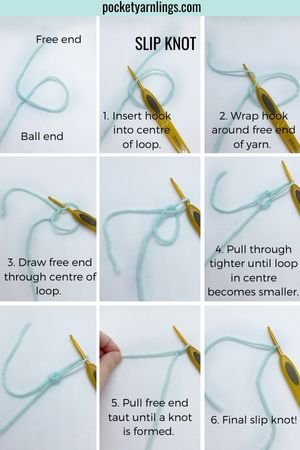
To start a slip stitch crochet, you first need to create a slip knot. Here's how you can create one:
Take the end of your yarn and make a loop.
Hold the loop with your left hand and grab the working yarn with your right hand.
Pull the working yarn through the loop to create a new loop.
Tighten the loop by pulling the working yarn gently.
Congratulations! You have successfully created a slip knot. To see the detailed step by step instructions, check out this comprehensive article titled, “Step-by-Step Guide: How to Effortlessly Master the Slip Knot in Crochet for Beginners”.

Making the First Chain
Now that you have your slip knot, it's time to make the first chain. Here's how you can do it:
Hold the slip knot with your left hand and grab the working yarn with your right hand.
Wrap the working yarn over the hook from back to front.
Pull the hook through the slip knot to create a new loop.
Tighten the loop by pulling the working yarn gently.
You have now made your first chain! Repeat this process to create as many chains as you need for your project.
Remember to keep your tension even to ensure your stitches are consistent. With practice, you'll be able to start slip stitch crochet projects with ease.


Mastering the Slip Stitch Technique
Now that we have talked about the basic units above which include creating the initial slip knot and then making the first chain, we can move onto mastering the slip stitch technique proper.
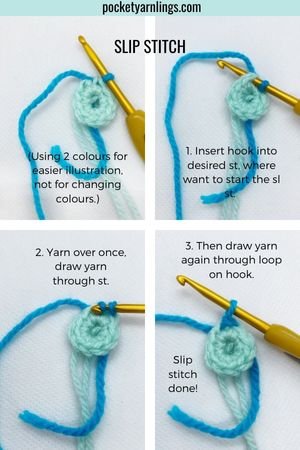
Inserting the Hook
To begin, insert your crochet hook into the stitch you want to work on. This can be the last stitch of the previous row, the first stitch of the next row, or any stitch in between. Make sure the hook goes under both loops of the stitch. It can also be inserted into the second chain from hook if you are working into a foundation chain.
Yarning Over
Next, yarn over by bringing the yarn over the hook from back to front. Make sure the yarn is behind the hook before you do this.
Pulling Through
Finally, pull the yarn through the stitch and then draw yarn again through loop on hook.
This completes the slip stitch.
It's important to note that slip stitch crochet can create a tight fabric, so you may need to adjust your tension accordingly. Additionally, slip stitch crochet can be used with any type of yarn, but it's best to use a hook that is one or two sizes larger than the recommended hook for the yarn.
Remember to insert the hook under both loops of the stitch, yarn over from back to front, and pull through both loops on the hook. With these steps, you'll be able to create beautiful and functional slip stitch crochet projects.
Also, remember to grab my free 45-paged cheat sheet on how to crochet for beginners step by step with pictures PDF download below. It is basically a beginner printable crochet stitch guide with free printable crochet instructions for complete beginners!
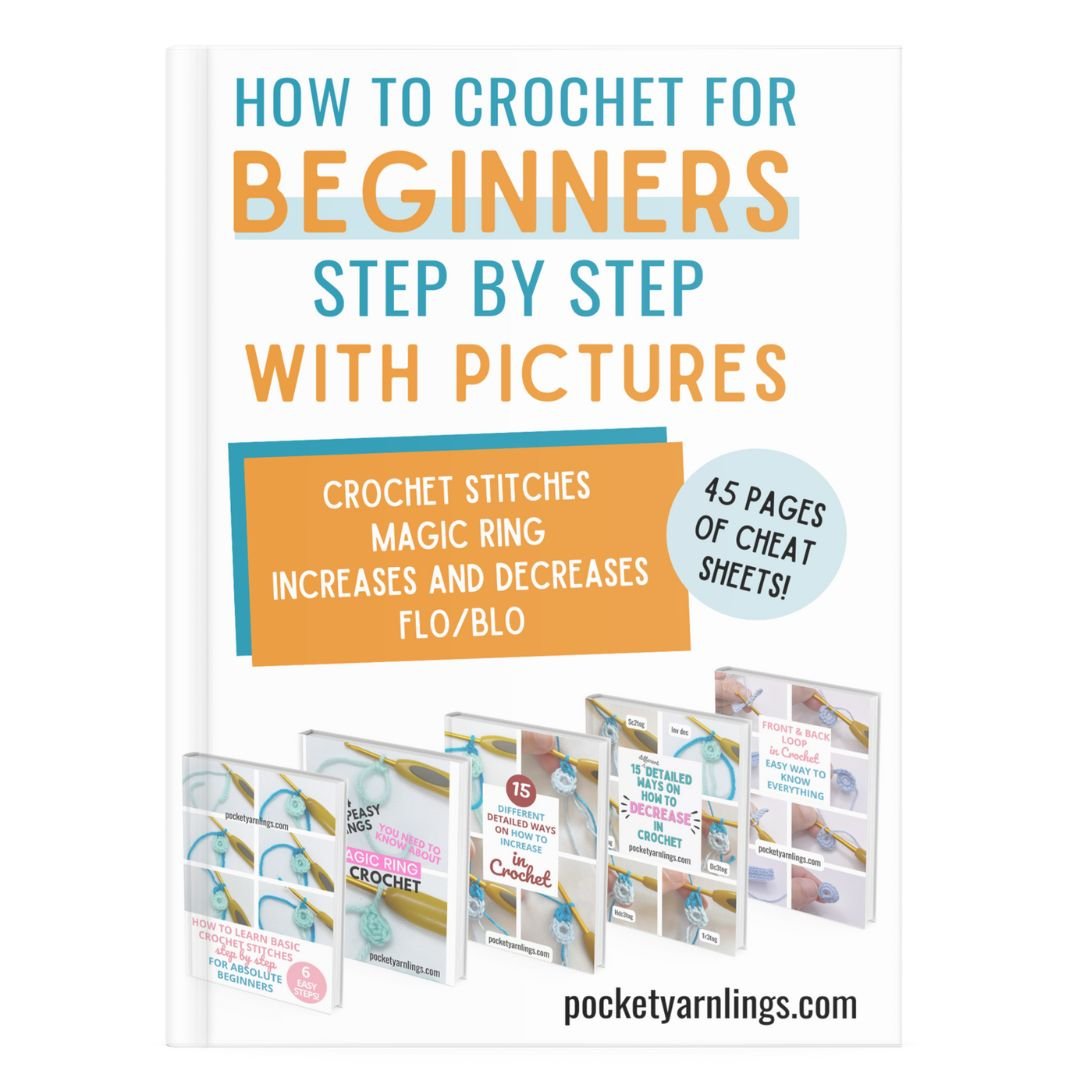
Free Beginners Step-by-step Guide
Grab these 45-pages of cheat sheets that will help you with crochet stitches, magic rings, increases and decreases, FLO and BLO. Click on image on left for access!
Slip Stitch in Different Crochet Situations
How do you slip stitch first chain from a hook?
Insert the hook into the second chain from hook, yarn over, pull through chain and then again through loop on the hook. Using this slip stitch method on a chain helps to create a flat pointed end, which I have used on numerous occasions to create a triangular or pointy flat 2D appearance, like for hairlocks!

How do you slip a stitch at the end of a row crochet?
Follow the same steps 1-3 after completing a row (which could be a single crochet row), by first doing a chain at the end of the row and then turning. If you finish up the row in just slip stitches, working into the subsequent row will be more difficult because inserting the hook into the tight stitches will be tougher.

How to slip stitch when crocheting in the round?
There is no slip stitch inside an initial magic ring. However, work the 3 above steps into a subsequent or the last round to either end off the round, or maybe make a colour change (for example an amigurumi) less obvious. There are quite a few uses for slip stitches when making amigurumi projects.
If you found this article useful, remember to share to Pinterest so that others might get inspiration from it too!

Different Patterns of Slip Stitch Crochet
Basic Slip Stitch Pattern
If you're new to slip stitch crochet, the basic slip stitch pattern is a great place to start. This pattern is as simple as it gets and involves working slip stitches into the previous row's slip stitches. You can use this pattern to create a solid, dense fabric that's perfect for items like coasters, pot holders, or even a warm scarf.
Advanced Slip Stitch Pattern
Once you've mastered the basic slip stitch pattern, you can move on to more advanced patterns. These patterns involve working slip stitches in different ways to create unique textures and designs.
One popular advanced slip stitch pattern is the slip stitch ribbing pattern. This pattern creates a ribbed texture that's great for cuffs, collars, and other decorative elements. To work the slip stitch ribbing pattern, you'll need to alternate between working slip stitches in the front loop and back loop of the previous row's slip stitches.
Another advanced slip stitch pattern is the slip stitch mosaic pattern. This pattern involves working slip stitches in a specific colour pattern to create a mosaic-like design. You can use this pattern to create intricate blankets, scarves, or even wall hangings.
Another one of my favourite ways to use slip stitch is surface slip stitching which is using a new set of yarn to surface slip stitch on an existing crochet project. This can create different textures for your crochet project and you can progress on from a slip stitch to other crochet stitches like single crochet and double crochet. See more of what I mean here.

Different Uses of Slip Stitch in Crochet
The slip stitch (sl st) is a fundamental stitch in crochet that serves various purposes and has multiple uses. Here are some of the common uses of slip stitches:
Joining
Slip stitches are frequently used to join rounds or pieces together in crochet. By inserting the hook into a specific stitch or space, yarning over and pulling the loop through both the stitch and the loop on the hook, you can create a secure join.
Shaping
Slip stitches can be used to create shaping in a crochet project. By working slip stitches into specific stitches or spaces, you can decrease or increase the stitch count and create curves, angles, or other desired shapes.

Surface embellishment
Slip stitches can be used to add decorative elements to a crochet project. By working slip stitches on the surface of a piece, you can create patterns, textures, or outlines. This was what I mentioned previously in the last section.
Finishing edges
Slip stitches are often used to create neat and finished edges in crochet projects. By working slip stitches along the edge, you can create a clean and polished look. This occurs when you are finishing up a crochet row or round and then you slip stitch and fasten off.
Joining yarn or changing colors
Slip stitches are commonly used to join a new yarn colour or attach a new yarn ball. This allows for smooth transitions between different colours or skeins. Learn all about colour changes here when you are ready.

Seaming
Slip stitches can be used to seam or join crochet pieces together. By working slip stitches through corresponding stitches or loops on different pieces, you can create secure seams.
These are just a few examples of the many uses of slip stitches in crochet. The versatility of slip stitches makes them an essential technique for crocheters.
Common Mistakes and Solutions in Slip Stitch Crochet
Tight Stitches
One common mistake in slip stitch crochet is making tight stitches. When you pull the yarn through a stitch, it's important to not pull too tightly, as this can cause the stitch to be smaller and tighter than the others. This can lead to uneven tension in your work and make it difficult to continue crocheting.
To avoid tight stitches, make sure you're not pulling the yarn too tightly as you work. You can also try using a larger hook size or loosening your grip on the yarn to help create more relaxed stitches.
Skipping Stitches
Another common mistake in slip stitch crochet is skipping stitches. This can happen when you accidentally skip a stitch or when you intentionally skip a stitch to create a pattern. However, if you skip too many stitches, it can cause your work to become uneven and misshapen.
To avoid skipping stitches, make sure you're counting your stitches as you work. You can also use stitch markers to help keep track of where your stitches should be. If you're intentionally skipping stitches, make sure you're following a pattern or chart closely to ensure you're skipping the correct number of stitches.
To learn more about using stitch markers to keep track of your crochet projects, check out this article titled, “10 Crochet Stitch Marker Types and their 10 easy Uses in Amigurumi“.
Differences between Slip Stitch and Other Stitches
Here is a quick section on the differences between slip stitch and other stitches like a chain stitch or a single crochet stitch. This is to clear up any confusion about all these basic crochet stitch units.
What is the difference between stitch and slip stitch?
In crochet, the term "stitch" is a broad term that refers to any individual element or loop that makes up the fabric. It encompasses different types of crochet stitches such as single crochet, double crochet, treble crochet, and so on. Each specific stitch has its own technique and characteristics.
On the other hand, the "slip stitch" (abbreviated as "sl st") is a specific type of crochet stitch. The slip stitch is the shortest and flattest of all crochet stitches.
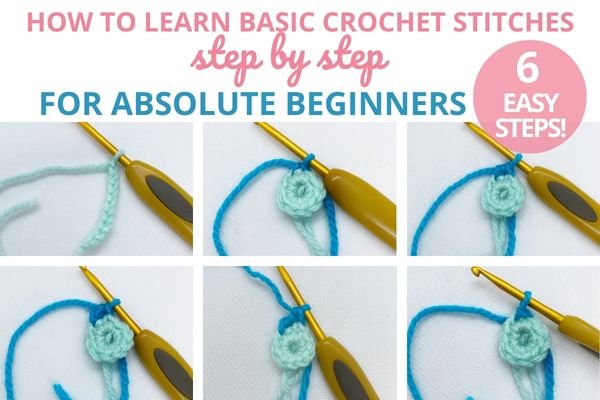
There are many other types of crochet stitches, apart from the slip stitch, which are explored more extensively in this article, “How to Learn Basic Crochet Stitches step by step for Absolute Beginners - 6 Easy Steps!“.
Does slip stitch count as a stitch?
In most cases, slip stitches are not counted as stitches when determining stitch counts or pattern instructions in crochet. Slip stitches are often used for joining, seaming, or creating decorative effects, but they don't add height or bulk to the fabric like other crochet stitches.
However, there can be instances where slip stitches are counted as stitches, especially in certain stitch patterns or specific design instructions. It's essential to refer to the specific pattern you're working on to determine whether slip stitches are included in the stitch count or not. The pattern will provide instructions on when slip stitches should be counted as regular stitches and when they are used for other purposes.
Is a slip stitch the same as a chain stitch?
No, a slip stitch and a chain stitch are different crochet stitches with distinct characteristics and uses.
Slip stitches are typically short, flat, and used for joining, seaming, creating surface embellishments, or transitioning between different parts of a project.
Chain stitches are typically taller than slip stitches and are commonly used to create the initial foundation chain, create spaces, or build height for other stitches in a crochet project.
What is the difference between single crochet and slip stitch?
The single crochet (sc) and slip stitch (sl st) are two different crochet stitches with distinct characteristics and uses.
The single crochet is taller and has more structure than the slip stitch. It forms a defined and compact stitch, whereas the slip stitch is the shortest and flattest of all crochet stitches.
Single crochet stitches are commonly used in various crochet projects to create a solid fabric, add density, or build height. They are versatile and suitable for a range of projects. Slip stitches, on the other hand, are primarily used for joining, seaming, creating surface embellishments, or transitioning between different parts of a project and are not typically used to build fabric or add structure.
If you found this article useful, remember to share to Pinterest so that others might get inspiration from it too!
Conclusion of Slip Stitch in Crochet
Congratulations! You have now learned how to crochet using the slip stitch technique. With this versatile stitch, you can create a variety of projects including scarves, hats, blankets, and even amigurumi!
The slip stitch is an easy stitch to learn, and once you have mastered it, you can easily incorporate it into your other crochet projects. It's a great stitch to use for edging, joining pieces together, and creating a smooth finish.
Remember to keep your tension even as you work, and practice makes perfect. Don't be discouraged if your first few attempts don't turn out exactly as you had hoped. Keep practicing, and soon you'll be creating beautiful slip stitch crochet projects in no time.
Here are a few tips to keep in mind as you continue your slip stitch crochet journey:
Experiment with different yarns and hook sizes to create different effects.
Use stitch markers to keep track of your progress and to make sure you don't miss any stitches.
Take breaks when you need to. Crocheting should be enjoyable, not stressful.
Don't be afraid to try new things and make mistakes. That's how you learn and grow as a crocheter.
Thank you for joining me on this slip stitch crochet adventure. I hope you have found this guide helpful and that you continue to explore the wonderful world of crochet. Happy crocheting!
Also, remember to grab my free 45-paged cheat sheet on how to crochet for beginners step by step with pictures PDF download below. It is basically a beginner printable crochet stitch guide with free printable crochet instructions for complete beginners!
Free Beginners Step-by-step Guide
Grab these 45-pages of cheat sheets that will help you with crochet stitches, magic rings, increases and decreases, FLO and BLO. Click on image on left for access!
Related articles
How to Learn Basic Crochet Stitches step by step for Absolute Beginners - 6 Easy Steps!
Step-by-Step Guide: How to Effortlessly Master the Slip Knot in Crochet for Beginners
Master the Art of Single Crochet Stitches: A Comprehensive Guide and Tips
Mastering Half Double Crochet Stitches: A Step-by-Step Guide and Tips
Mastering the Double Crochet Stitch: A Comprehensive Guide and Essential Techniques
Master the Treble Crochet Stitch: A Comprehensive Guide and Tips