
How to Crochet a Sharp Angle in Amigurumi (Chain and Cluster Stitch Method)
Learn how to crochet a sharp angle in amigurumi using chains and cluster stitches to create strong, defined bends with a corner-like shape.
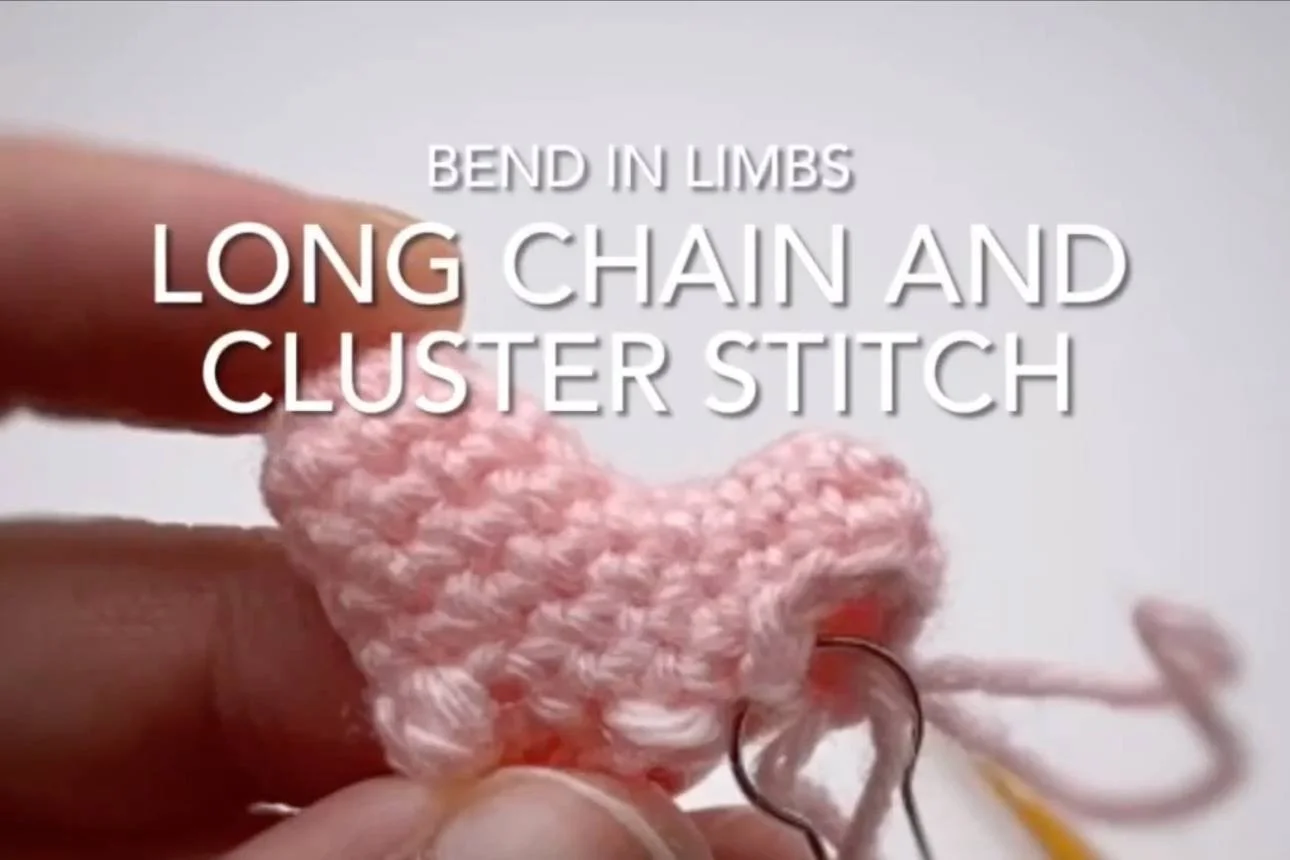
Table of Contents Show
Where This Fits in Amigurumi Bends
There are a few different types of bends you can create in amigurumi:
Gentle curves (smooth, gradual shaping)
Right angle bends (90° turns)
Sharp bends (steeper, more dramatic angles)
👉 In this tutorial, we’re focusing on right angle bends, where the shape changes direction more clearly.
There are a few different ways to create right angle bends:
Short rows → builds the angle gradually
Chain and cluster stitches → creates a sharper angle through contrast
Equal chain and surface crochet → creates a more structured, controlled angle
👉 In this post, we’ll be focusing on the chain and cluster stitch method, which creates a stronger, more defined bend compared to short rows.
How Chain and Cluster Stitches Create a 90° Bend
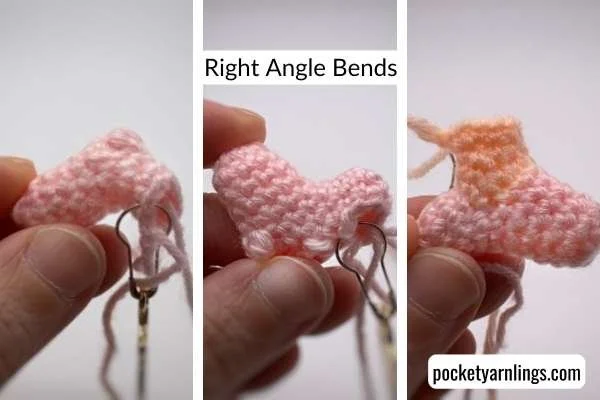
Start with a Base Cylinder
Begin with a simple crochet cylinder:
Round 1: Magic ring sc 10 – 10 sts
Round 2: Sc 10 – 10 sts
Rounds 3–5: Repeat Round 2 – 10 sts
👉 This forms the same neutral base before shaping begins.
The Key Idea: Extending One Side and Compressing the Other
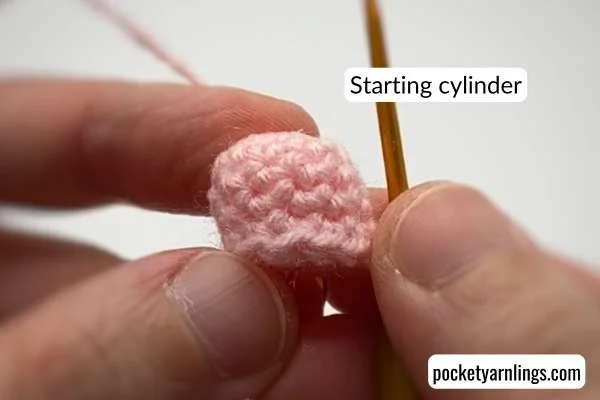
This method works by creating a strong contrast across the round:
A chain builds length outward
A cluster stitch (dc3tog) pulls stitches together
This creates a sharp imbalance in the structure
👉 That contrast is what produces a more defined bend.
How the Angle Forms
One side extends outward with the chain
The opposite side tightens with the cluster stitch
The difference in length causes the piece to bend
👉 The bend becomes more pronounced quickly, compared to curve-based methods.
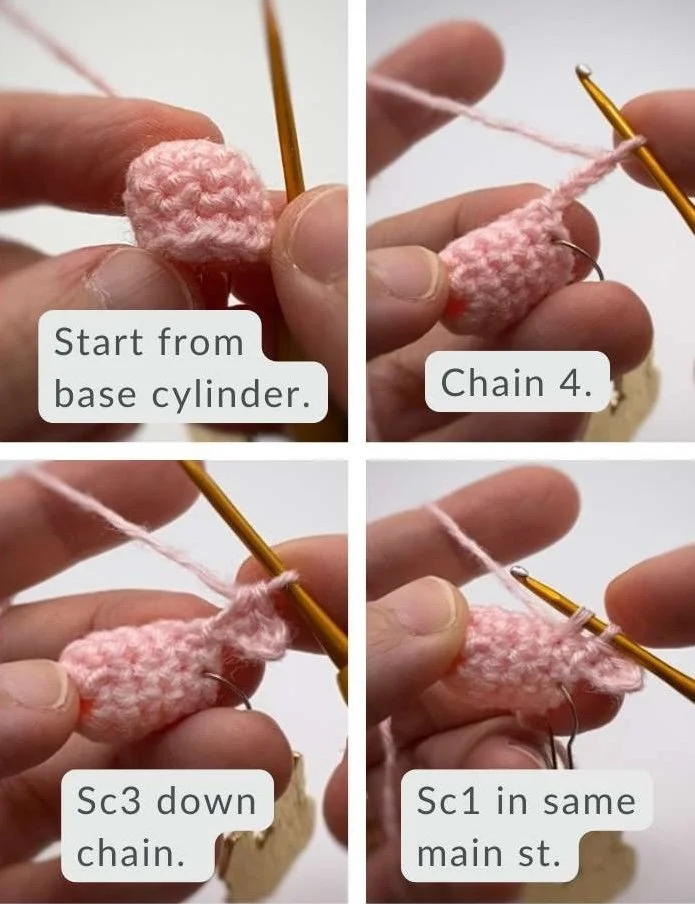
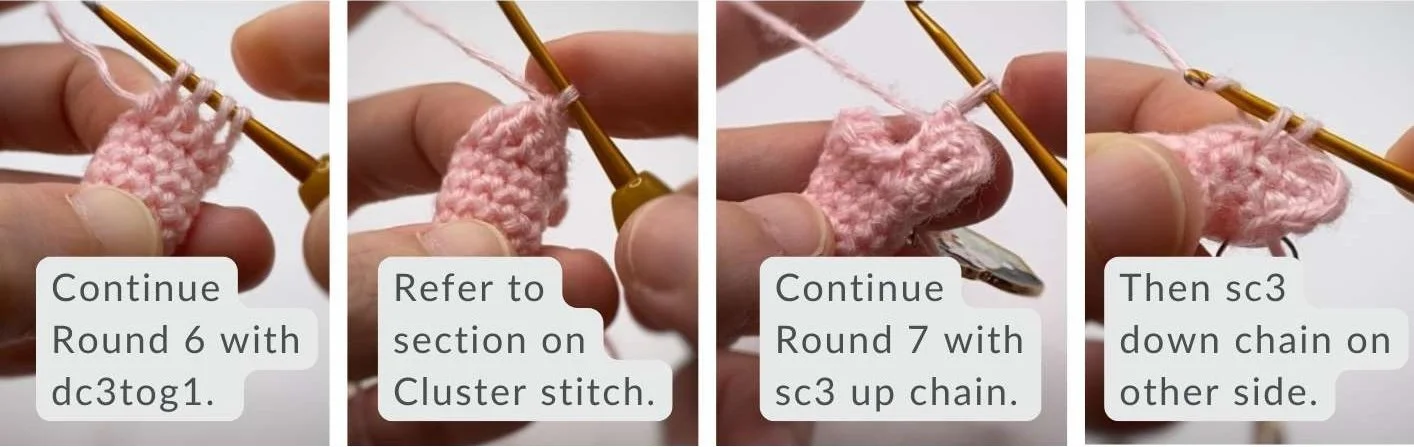
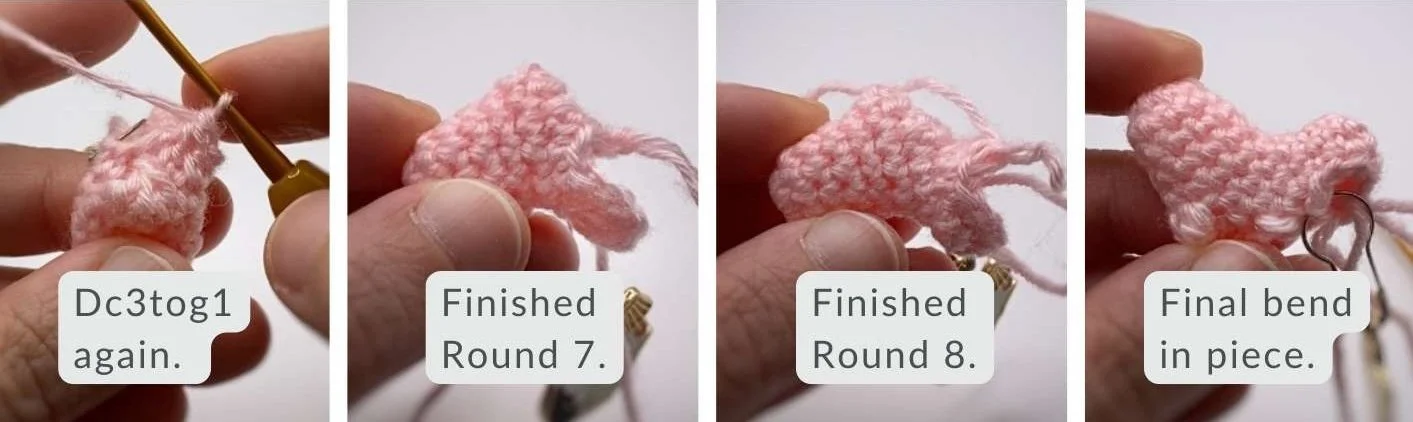
What the Finished Bend Should Look Like
Sharper than the short row method
More defined, corner-like shape
Holds its structure firmly
👉 This creates one of the most defined bends compared to curve-based techniques.
Basic Pattern for a 90 Degree Crochet Bend
Here’s a simplified example:
Pattern Snippet
Round 6: Sc 2, ch 4 and sc 3 down chain, sc 1 in same main st, sc 3, dc3tog, sc 2 – 12 sts (excluding chain)
Round 7: Sc 2, sc 3 down chain, sc 3 down other side of chain, sc 1 in same main st, sc 2, dc3tog, sc 1 – 13 sts
Round 8: Sc 10, dc3tog – 11 sts
Round 9: Sc 3, sc2tog x4 – 7 sts
Watch How the Bend Forms Step-by-Step
If you prefer to see how the stitches come together, you can follow along in this video below. Notice how the chain extends one side outward while the cluster stitch pulls the opposite side inward, creating a sharper angle.
How to Control the Sharpness of the Angle
Why This Method Creates a Strong Angle
This method creates a sharper bend because:
The chain adds immediate length
The cluster stitch removes space quickly
The contrast between the two is strong
👉 This produces a more dramatic, corner-like bend.
How to Adjust the Angle
This method has limited flexibility compared to short rows.
A longer chain + tighter cluster mainly makes the piece longer
It does not drastically change the angle
To adjust the angle slightly:
Work more single crochet stitches before and after the chain
This shifts the position of the bend
👉 However, the overall angle will remain relatively fixed.
How to Use This Technique in Amigurumi Designs
This method works well when you need a strong, structured bend.
You can use it for:
Head-to-body transitions
Neck bends
Limbs that need sharp positioning
Stylised shapes
It’s especially useful when the bend needs to hold its shape clearly.
👉 For example, in my cow design below, this method is used to shape the transition from the head to the body. When the animals are lying down with their heads stretched upwards, this technique creates a strong bend from the neck into the body, helping the pose feel more natural and supported.

Other Ways to Create Bends in Amigurumi
If you’re exploring different shaping techniques:
Short rows → softer, more adjustable angles
BLO/FLO → subtle, structured curves
Stitch height → stronger curves
Each method gives you a different level of control depending on the effect you want.
👉 If you’d like a bigger picture of how all the bend techniques fit together, you can find them in the Ultimate Guide on How to Crochet Bends in Amigurumi (9 Ways to Shape and Control Curves).
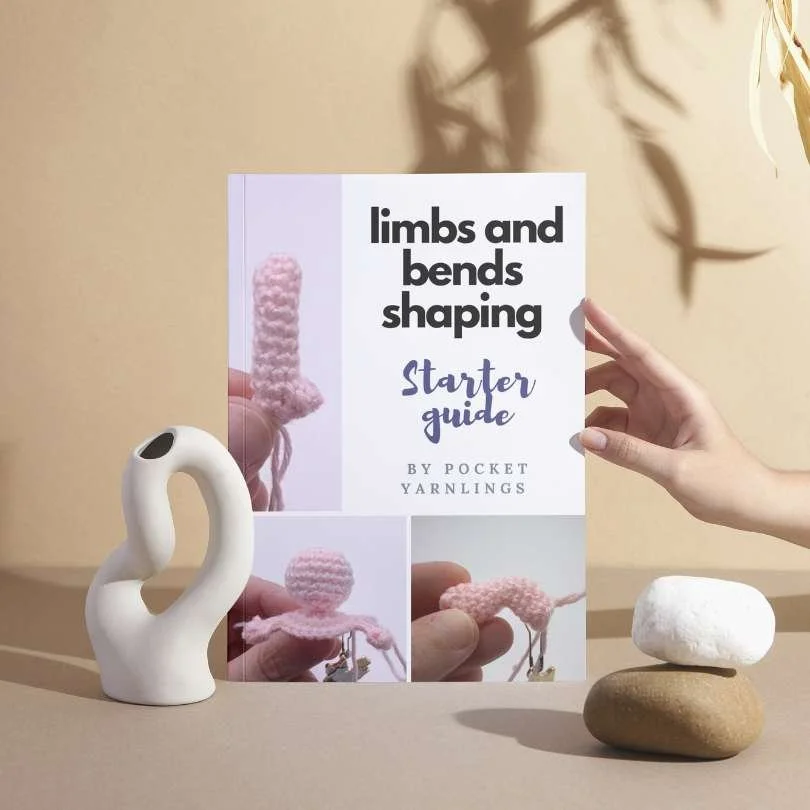
Try Your First Amigurumi Bends
Put what you’ve learned into practice with easy arm, leg, and bend patterns. Grab it free over here.
Want to Explore More Types of Bends?
This surface crochet method is just one way to create clean, structured angles.
There are also:
gradual bends
perpendicular bends
steep and split bends
👉 Each technique creates a different effect depending on how you shape and structure your stitches.