

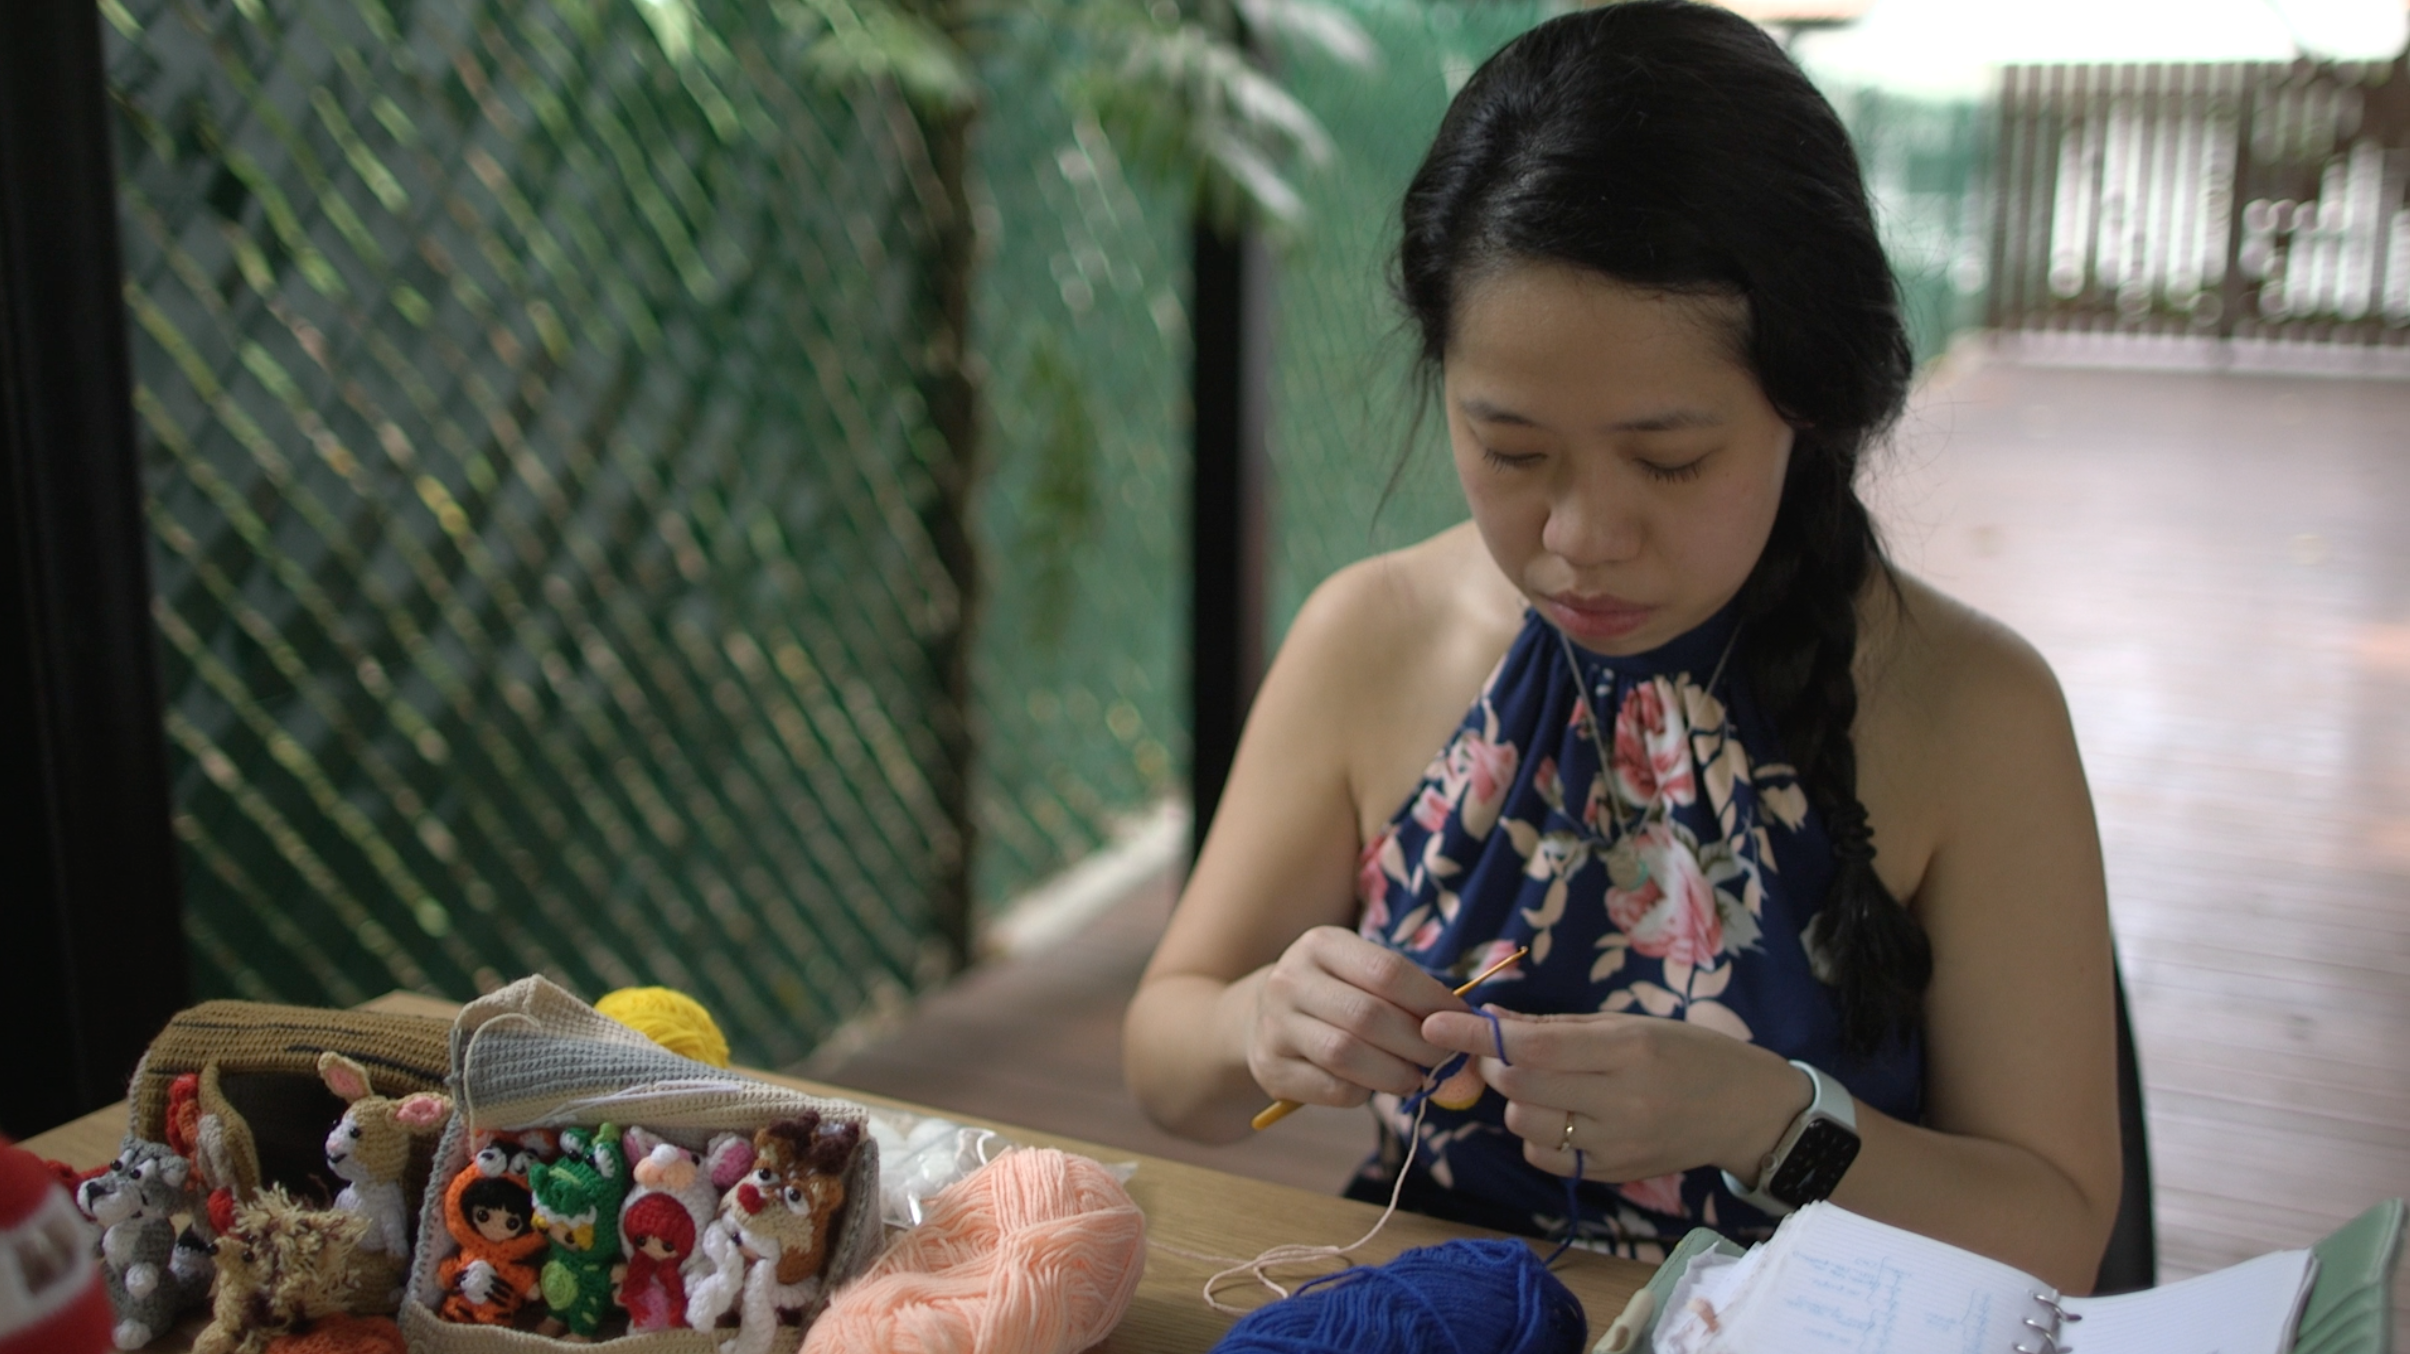
How to Crochet Dolls: 7 Key Techniques for Body, Head, Hair & Clothes
If you want to learn how to crochet dolls, this pillar guide will walk you through every essential part of a crochet doll—from shaping the body and head to adding hair, faces, and clothes.
Whether you're new to doll-making or expanding your amigurumi skills, this guide links out to deeper tutorials, technique breakdowns, and step-by-step examples so you can build beautifully structured handmade dolls with confidence.
Use this post as your starting point and explore each doll component at your own pace.

Table of Contents Show
Introduction on How to Crochet Dolls
This guide walks you through all the essential parts of crocheting a doll. We’ll start with the head and body, then move on to the arms and legs, followed by facial features, hairstyles, and finally the clothes. By the end, you’ll know exactly how each part is constructed—and you’ll have plenty of deeper tutorials to explore if you want to learn more about a specific area.
How to Crochet a Doll Body
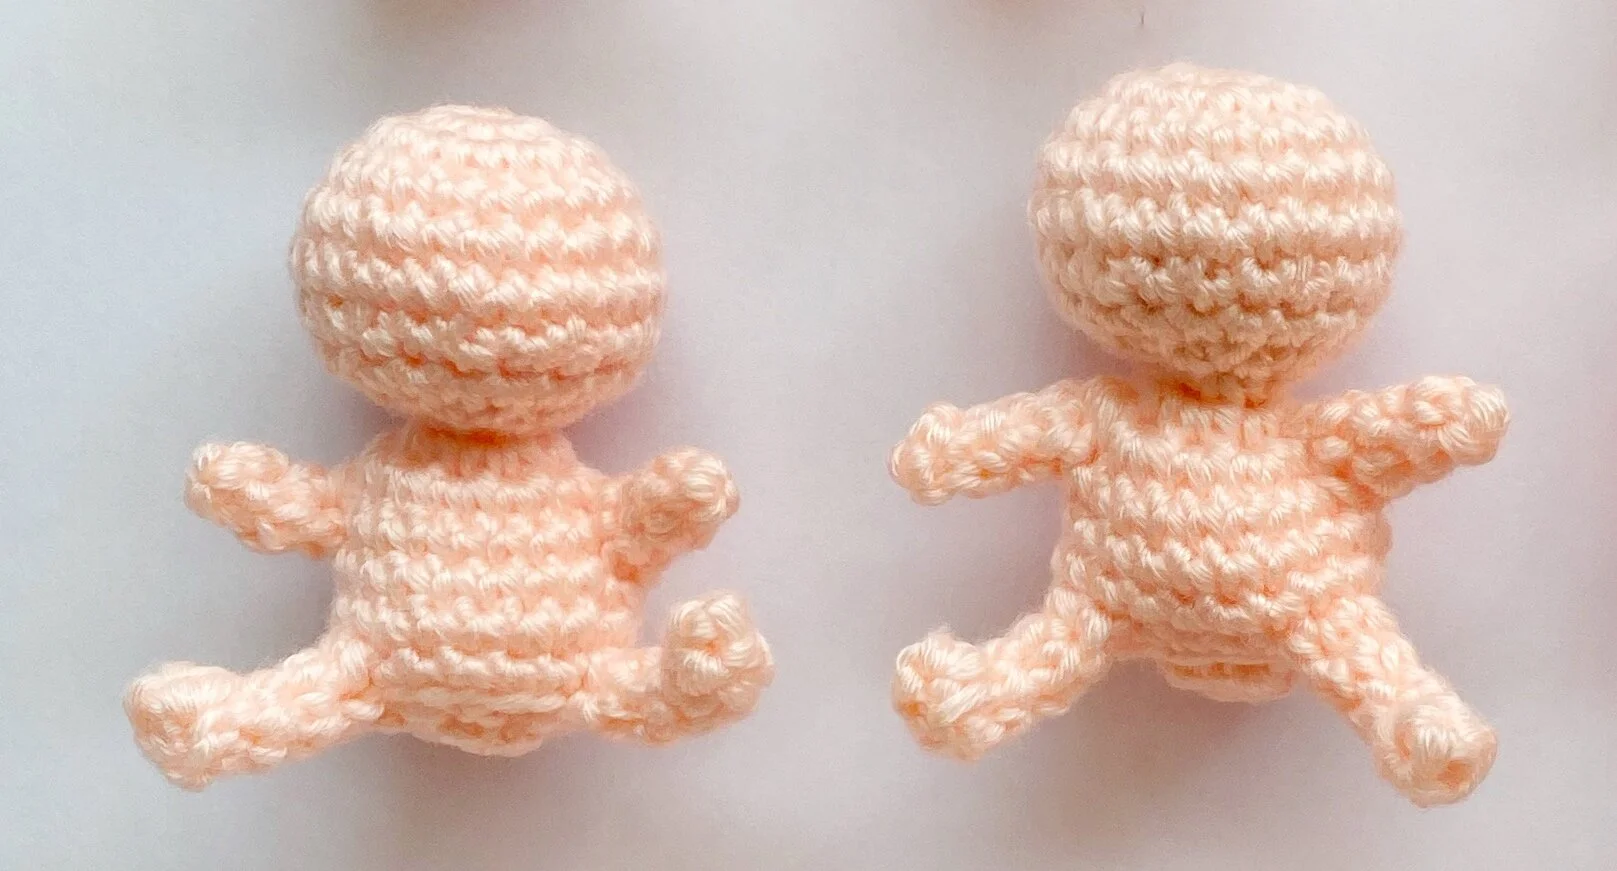
Most crochet dolls begin with a sphere-shaped head. From there, the body is typically worked in one continuous piece and shaped like a cylinder. You can add simple variations—such as a gentle bust for female dolls or a slight taper to form a waist—to enhance character and proportions.
Once the head and torso are complete, the next step is to attach or construct the arms and legs. There are three main ways to create doll bodies with limbs:
Sewing Method (Traditional Method)
This is the most common approach for beginners:
Make the head and body as one piece
Crochet all four limbs separately
Sew each limb onto the body
It’s simple to understand but can sometimes lead to asymmetrical placement, especially for beginners. This method also requires sewing five separate parts, which can be tedious.
Seamless Method (Crocheting Limbs Into the Body)
This method involves:
Extending arms and legs directly from the body using chains
OR creating quick bobble-stitch limbs
This is the fastest technique and great for smaller dolls or keychains.
However, it may look less like a traditional “doll” because of its very simplified form.

Surface Crochet Method (No-Sew Popular Technique)
Surface crochet is a highly popular no-sew approach because it creates:
Clean placement
Symmetrical limbs
Faster finishing than the sewing method
There are two common variations:
Bottom-up version: Start with two legs, join them, and work up the body and head
Top-down version: Finish the head + body first, then surface crochet cylinders onto predetermined holes for limbs
This gives predictable, even placement and avoids messy sewing.

📹 Video Tutorial: Surface-Crochet Cylinder on Sphere
👉 How to Attach Crochet Arms or Legs to a Sphere | Sturdy Seamless Method
📌 Recommended Deep-Dive Tutorials for Crochet Doll Body
If you want to explore different body construction methods, these guides break everything down:
✔ 3 Easy Techniques on How to Make a Crochet Doll Body (No Sew Included!)
✔ 3 Crochet Techniques and 9 Methods for Attaching Limbs to Body
How to Crochet Doll Limbs (Arms, Legs & Feet)
As mentioned in the body section above, doll limbs refer to the arms and legs, and they are usually shaped as simple cylinders. While the construction is straightforward, the way you attach and detail them will determine how expressive and polished your finished doll looks.
Attachment Methods
Limbs Made Directly Onto the Body
These limbs are created as part of the main body while crocheting:
Bobble stitches in the round
Bobble stitches on a chain
This method is quick, seamless, and great for small dolls or keychains. It also eliminates sewing and gives a cute, simplified look.
📹 Video Tutorial: How to crochet an doll arm without any sewing involved
Limbs Made Separately, Then Attached to the Body
This includes:
Sewn-on limbs — traditional method
Surface-crocheted limbs — no-sew cylinders attached onto the body
Surface crochet is especially popular because it produces clean, symmetrical placement. This ties back to the three main body methods covered earlier (sewing, seamless, and surface crochet).
Detailing Options
Hands Extended from Arms
You can add simple hand shapes using:
small bobble stitches
short chains fanned out
These add personality without much extra work.

Feet Extended from Legs
To create more defined feet, you can use:
popcorn stitches
shell stitches
cluster combinations
These give your doll a cute, rounded foot or slipper shape.

Adding Bends for Realistic Postures
Bends in the arms or legs allow your doll to sit, pose, or hold objects. These are created with:
increases and decreases
stitch height variation
selective shaping in the cylinder
This small detail can instantly make a doll feel more expressive.
📹 Video Tutorial: How to Crochet a Curve | Crochet Curved Tube & Amigurumi Bend Tutorial
📌 Recommended Deep-Dive Tutorials for Crochet Doll Limbs
Create Dolls That Feel Truly Your Own
Ever wished you could tweak a doll pattern so it looks exactly the way you imagined? In this free training, you’ll learn how simple shaping techniques can help you start customizing your own amigurumi dolls with confidence.
How to Crochet Doll Heads & Faces
Many crocheters begin with a simple spherical head, add safety eyes, and skip the nose or mouth for a classic ragdoll look. This minimal style is adorable and timeless.
But if you want to give your doll more personality, you can easily customize the head shape, eyes, nose, and mouth. Below is an overview of the most common options.
Doll Head Shapes
Most doll heads start as a sphere, but different shaping can dramatically change the character of your doll.
Common head shapes include:
Classic spherical head (most popular and versatile)
Heart-shaped head
Reverse pear shape (wider at the bottom, slimmer at the top)
Square or defined jawline
Each shape creates a different mood even before adding facial features.
📹 Video Tutorial: How to crochet a heart shaped doll head
Doll Eyes
Eyes determine much of a doll’s expression, and there are many styles to choose from.
Popular eye types include:
Safety eyes
Glass eyes
French knot embroidery (great for small dolls)
Crocheted eyes (fully soft and child-safe)
Cloth or felt eyes (glued or sewn on)
Needle-felted eyes
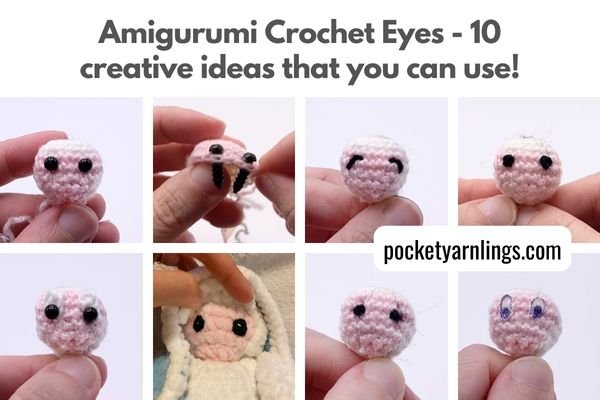
Experimenting with eye types can completely change the doll’s personality.
📹 Video Tutorial: Using French knots in Doll Amigurumi Eyes
Doll Noses
Noses can be subtle or more defined depending on the style you want.
Common nose shapes include:
Small round nose
Sharp pointed nose
Upturned nose
Downturned or hooked nose
Even tiny changes make a noticeable difference in the doll’s expression.
📹 Video Tutorial: How to crochet a doll nose - sharp and pointed one!
Doll Mouths
Mouths are another small detail that can add charm and character.
Options include:
No mouth (minimalist and popular)
Simple embroidered line
Small or large open mouth
Crocheted mouth
Fully embroidered mouth with curves or expressions
Don’t be afraid to try different styles—sometimes the simplest option is the cutest.
📹 Video Tutorial: How to Crochet an Open Mouth for your Doll Amigurumi
📌 Recommended Deep-Dive Tutorials for Crochet Doll Heads & Faces
How to Crochet Doll Hair - Doll Hairstyle Ideas
Hair customization is one of the most enjoyable parts of doll-making because you can dramatically change a doll’s personality without altering the head shape. A simple switch in hairstyle can make the same doll look younger, older, sweeter, more playful, or more expressive.
You can create short hairstyles for boy dolls, long flowing strands for girl dolls, or tie the hair into different styles for added character.
Long Hair Styles
Long hair is perfect for expressive, flowing looks and works well with many face shapes.
Options include:
Straight wig cap hair
Curly wig cap hair
Wavy wig cap hair
These can be brushed, left as strands, or styled further into braids or updos.
📹 Video Tutorial: How to crochet a curly hair wig cap for your doll amigurumi
Short Hair Styles
Short hair is great for boy dolls or cleaner, simpler designs.
Techniques include:
Loop stitch techniques
Surface-crocheted short strands
Short wig caps
These styles are quick to work up and beginner-friendly.

Tied or Styled Hair
For more personality and detail, you can create tied hairstyles such as:
Buns
Braids or plaits
Ponytails
These styles let you position hair in practical or expressive ways.
Fringe (Bangs) Options
Fringe can completely change a doll’s face and expression.
Common choices include:
Sharp straight bangs
Tied-back fringe
Loopy or curly fringe
Puffy, voluminous fringe
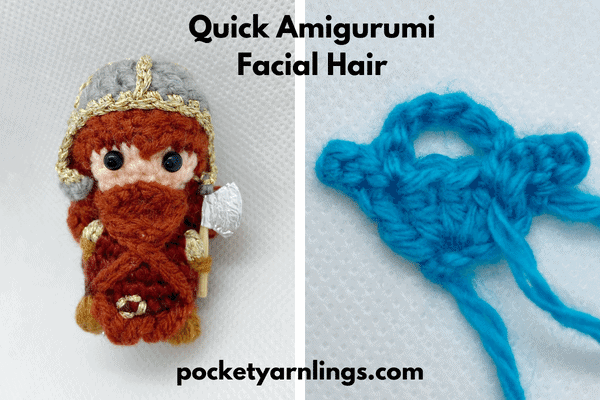
Facial Hair
For adult or character-driven dolls, you can also add facial hair:
Moustaches
Beards
Goatees
These can be embroidered, crocheted, or surface-attached.
📌 Recommended Deep-Dive Tutorials for Crochet Doll Hairstyles
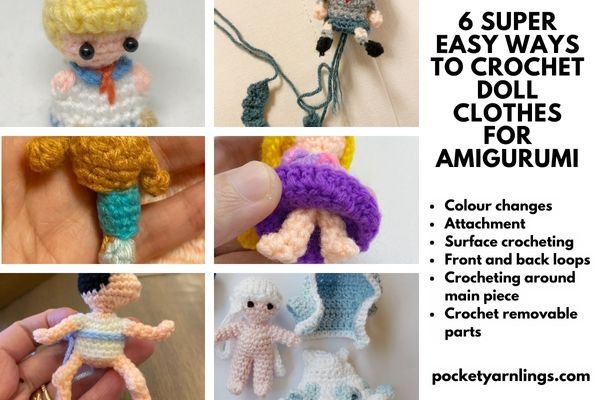
How to Crochet Doll Clothes
When crocheting doll clothes, the technique you choose often depends on the size of the doll and the style you want.
For smaller dolls, simple colour changes or surface details work best.
For larger dolls, you may want to create separate removable clothes like dresses, skirts, jackets, or tops.
Instead of focusing on specific garments, here are the main techniques used to create doll clothes in crochet.
Techniques for Making Crochet Doll Clothes
Colour changes in amigurumi
Add simple clothing effects directly onto the body.
Attached clothing
Crochet clothing shapes as part of the doll itself for a seamless look.Surface crochet details
Add decorative lines, hems, belts, or clothing edges on top of the body.Front-loop / back-loop techniques
Create ridges, layers, or the start of skirts and tops.Crocheting around the body
Build clothing outward from the torso to create simple dresses or flared skirts.Separate removable clothing
Make standalone pieces such as skirts, jackets, shirts, or hats for dress-up play.
📌 Recommended Deep-Dive Tutorials for Crochet Doll Clothes
✔ 6 Super Easy Ways to Crochet Doll Clothes for Amigurumi (Including Dresses!)
🧶 Recommended Yarn & Hooks for Crochet Dolls
The type of yarn you choose has a big impact on how your doll looks, feels, and holds its shape. Different yarns give different textures and personalities, and certain materials work better for specific doll sizes.
Below are the most commonly used yarn types for crochet dolls.
Yarn Options
Cotton yarn
Crisp stitches, strong durability, and excellent stitch definition.
Ideal for small or medium-sized dolls.Acrylic yarn
Soft, easy to work with, and very beginner-friendly.
Affordable and widely available.Chenille yarn
Best for large, plush-style dolls with a soft, cuddly feel.
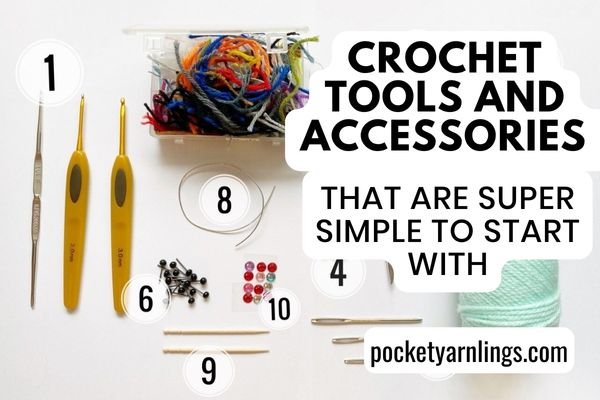
Hook Size Guidelines
Use a hook smaller than the recommended size on your yarn label to create tight, gap-free stitches.
For cotton yarn, most doll makers use 2.25mm–3.5mm hooks.
For plush or chenille yarn, 4mm–5.5mm works well.
Even, firm stuffing also helps maintain the doll’s shape and stability.
📌 Pin This Guide for Later

Create Dolls That Feel Truly Your Own
Ever wished you could tweak a doll pattern so it looks exactly the way you imagined? In this free training, you’ll learn how simple shaping techniques can help you start customizing your own amigurumi dolls with confidence.
🎁 Free Crochet Doll Pattern to Try Next
Once you’re comfortable with basic shaping, try this fun, slightly more advanced doll pattern:
Free Crochet Doll Pattern: Rosie in a Swimsuit (Perfect for Summer!)
This pattern is great for practicing:
extended chain limbs
simple doll shaping
surface details
beginner-level hair
It’s a lovely next step after the starter doll.

What’s Next
If you're excited to try more doll projects or explore new character designs, here are some helpful resources to continue your doll-making journey:
🎨 85 Crochet Amigurumi Doll Patterns and Designs to easily get started with »
Explore a big collection of beginner-friendly and character dolls for instant inspiration.
🧙♂️ Free Fred Jones Pattern from Scooby Doo! »
A simple male doll body to practice clean shaping and basic styling.
❄️ Free Mini Elsa Crochet Pattern! »
A cute female doll shape with easy hair and outfit details to try next.