

20 surefire ways to Crochet Amigurumi that are Toddler Safe
Always wondered whether the toy you made yourself is safe enough for child consumption - or specifically toddler consumption? Amigurumi are oftentimes made by crocheters to be gifted to children, whether for daughters or sons, nieces or nephews, or for grandchildren.
Also depending on the age group of the child, one might choose different types of yarn materials to create different toys. Perhaps bulky yarn for plushies or softies, perhaps cotton yarn to make pretend play sets, or just acrylic yarn for make the children’s room hanging mobile.
In this particular blog post, I will be reviewing some simple suggestions to think about when making your next amigurumi, especially for toddlers, who have more safety considerations than other older age groups.
To crochet toys are that safe for toddlers, I broke it down into considerations in terms of the materials used in construction, techniques involved in making it and some general tips to think about.
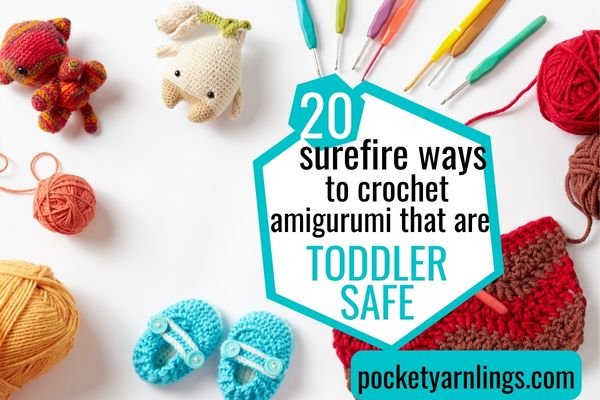
Table of Contents Show
Materials
Yarn
1. Hypoallergenic yarn
When deciding on yarn materials, every crocheter has their preferences but when it comes to considerations for crocheting for children, pick materials that are hypoallergenic, or less likely to cause allergens in kids. Avoid fuzzy or mohair yarn or even wool and when in doubt, sticking to simple cotton yarn is generally safe, like what I did below here.
2. Bulkier yarn
Similarly pick thicker yarn like bulky yarn and avoid lace, which might make the amigurumi too small for toddlers. That is great to crochet plushies for hugging!

3. Machine washable yarn
Other considerations include picking materials that are machine washable seeing as how toddlers love to put things inside their mouth, washing their toys on a regular basis is unavoidable.
Along the same vein, also avoid hand dyed yarns in case the colour runs or bleeds in the washing machine. Unless you intend to hand wash all the crocheted toys then this should not be an issue.
Stuffing
4. Polyester fibre fill
As for stuffing, pick polyester fibre fill which is great for children’s toys and easy to wash as well. Avoid beaded stuffing which is sometimes used to make weighted amigurumi, because it can become a choking hazard.
5. Right quantity of stuffing
Pick less stuffing if you want the amigurumi floppier but generally for plushies, more stuffing to make them huggable! But be careful of overstuffing as you might get big gaps in your amigurumi. This will be elaborated on under techniques later.
Crochet hook
6. Smaller Crochet hook
This particular equipment does not affect the final materials of the end product per se but it does affect the end construct. I am referring to using a smaller crochet hook paired with a bigger yarn, for example perhaps a 2.0mm or 3.0mm hook for a 4 ply yarn. The idea is to reduce the gaps created in the final amigurumi.
Accessories
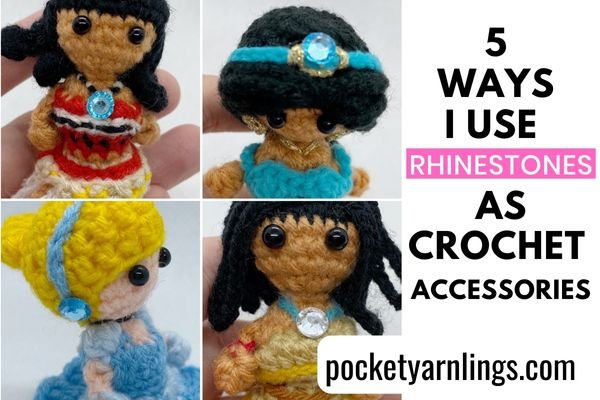
7. Avoid Accessories
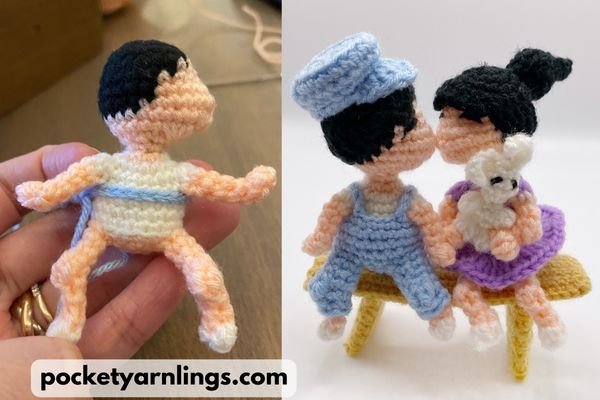
Accessories in this instance are what are often used for amigurumi detailing. For instance, using rhinestones or wiring. I have used rhinestones to simulate gems for princesses and wiring as spectacles or bows and arrows.
To see more examples of what I mean - check out rhinestones use here and wire work over here. Now avoid all these detailing for toddler toys as every piece of it could be bitten off.
8. Avoid Safety eyes
I know I know it is technically called safety eyes. If you crochet tightly enough around it and fasten down the front and back washer tightly, logically it should be very safe.
The issue with amigurumi toys that are played often by children is that, over time, the stitches might loosen around the safety eye. Which means, it could fall out years after it was initially crocheted.
This is definitely by no means any fault of the materials used or the crochet techniques involved. Hence the reason I mentioned to avoid using it altogether and try other more secure techniques in creating the eyes!
9. Avoid using glue
For attachments in general, consider sewing over using glue, like for hair wig cap attachments to amigurumi heads. The glue components itself on the toy will not be safe for children!
Techniques
Crocheting techniques
10. Use tighter tension
This is mainly to prevent gaps in the amigurumi, much like the next point as well. This is also in line with not overstuffing the amigurumi as mentioned previously, in conjunction with using the invisible decrease, all to minimize gaping holes in the amigurumi. (Of course if you do intend to use safety eyes anyway, then this is equally important so it does not fall out.)
11. Use invisible decrease
Using this method of decreasing the rounds over single crochet decreases can not only make the amigurumi look better but it also helps with minimizing the gaps seen in the amigurumi. You don’t really want the stuffing inside the toy to come out while your toddler is playing with it.

12. Tucking in stray yarn ends
Don’t forget to weave and tuck in final stray ends neatly. The last thing you want is your toddler chewing a bit of left over yarn that is sticking out. When fastening off the ends, make sure they are tight so that they do not come apart after many months of getting flung around. Then push and hide the protruding ends back inside the amigurumi.

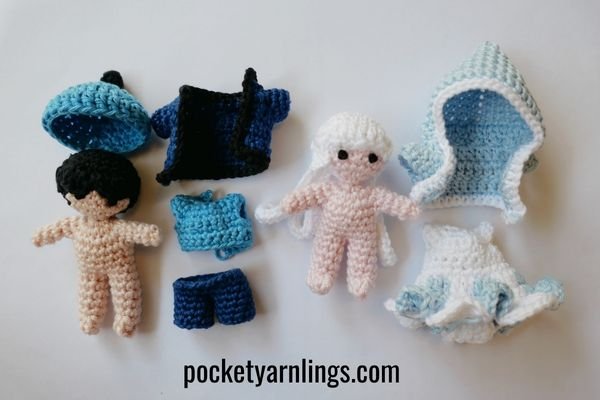
13. Crocheting non-detachable layers
Here I am referring to situations when you might layer your amigurumi for example if a doll or an animal wears some clothing. Instead of the option to make it removable or detachable (which is something you might want to make for a preschooler), choose the option to just crochet around the main piece and fasten it down. Expect your toddler to rip the toy to pieces so either sew down the outer piece or maybe simple just crochet an additional layer all around on top of the main amigurumi body.
14. Making the eyes
Use sewing on techniques or embroidery techniques like the French Knot over safety eyes. An example of the former would be to simply using a darning needle and some yarn to thread through some simple lines as the eyes for the amigurumi. Other options like using the French knot or even felting down securely can also be safer options than safety eyes.
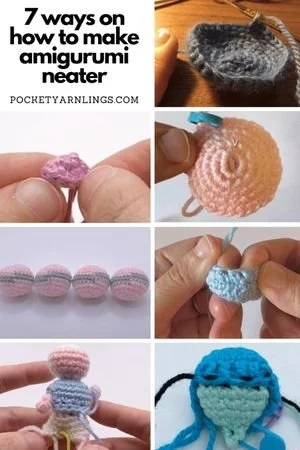
Check out more crochet techniques and 7 ways on how to make amigurumi neater below!
Sewing techniques
15. Minimize sewing
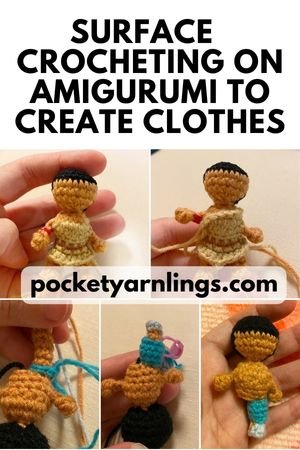
I know I did mention avoid using glue and sew instead. This time I’m referring to specific parts that can be combined without requiring sewing at all. Most of my favourite techniques for attaching amigurumi parts include surface crocheting and seamless crocheting, which both don’t involve sewing at all.
For example, incorporate limb attachment to body using surface crocheting or make ears for amigurumi animals by seamless crocheting in a round so that they don’t come apart easily. There are many ways to do this apart from sewing!
16. If sewing, secure down stitches multiple times
If sewing is unavoidable, as it is sometimes, then remember to thread in and out multiple times securely using whip stitch or mattress stitch technique. I briefly talk about these 2 sewing techniques over here. Remember to go over more times and then tuck in stray ends at the end, which leads me to my next point.
General Tips
17. Larger Amigurumi Toy Size
Along the same lines of using larger yarn like I mentioned above, aim to make the toy larger because smaller Amigurumis can be dangerous for toddlers who love to put things inside their mouths. You could always use an old pattern that you love that was meant for mini Amigurumis, switch it up and use larger yarn to make the same toy but at much larger scale the second time.
18. Hand wash their toys
Of course this is very much personal preference. Generally if you did try some of the suggestions above, technically if you machine wash your amigurumi it should not come apart. This would all be easier though if you just hand wash your Amigurumis and hang them outside to dry (no dryers!) but this largely depends on the materials you use. To be honest, I’m not a huge fan of how fuzzy acrylic yarn can be after washing, which is why I suggested using cotton yarn right at the top of this article.
19. Monitor child when they are playing with it
Like all things with toddlers, at the end of the day, you always still need one eye out to check on them but expect the unexpected when it comes to kids. They sometimes do silly things to surprise and you must be ready to pounce on them if you see something dangerous about to happen.
20. Check for whether repairs are needed
Last but not least, periodically check on your Amigurumis after they have been played with for whether repair work is necessary. I have had to do this on a few occasions and from there, I also know where I have to work on sewing things down tighter for future projects. It’s also in good fun and I’m sure your child will appreciate any toy you crochet for them!
Pin this image below and share it if you found this article useful!

Conclusion
Here are the 20 tips and suggestions I have for crocheting amigurumi for toddlers. They include some ideas for material selection, crochet techniques to use and tips in general. You will have some problems along the way when you start gifting but with each new amigurumi, you will always try to work better than previously. Do you have any other suggestions to make your amigurumi toddler safe - comment down below.
If you like to get started on crocheting dolls using some of the suggested non sewing techniques above, try out this free '5 tiny steps to crochet a doll in 30 minutes without tiresome sewing' along with a free pattern and some crochet-a-long videos. (But don't use the suggested eye techniques here because this is not safe for toddlers :)!
Also if you know of a fellow crocheter or mummy crocheter, I would love for you to pin this to share or share this post to them!