

How to Crochet an Oval
Oval Series
How to crochet an oval
How to crochet an ovoid - foundation chain and crochet around (part 1)
How to crochet an ovoid - treble bobble crochet (part 2)
How to crochet a pointed oval - foundation chain and rotate (part 1)
How to crochet a pointed oval - foundation chain with varying heights (part 2)
How to crochet a pointed oval - using tall stitches (part 3)
How to crochet a pointed oval - using Magic ring (part 4)
How to crochet a biconvex (3D pointed oval)
This is the start of the ‘Oval Series’. If you have not gone to check out my previous basic ‘Circular Series’, go check it out here. It is the most basic way to start amigurumis. For further customization, let’s try out the Oval series!

How to crochet an oval
The crochet pattern only consists of 2 rounds in this example:
Round 1: Ch4, sc2, 3sc1, go around chain, sc1, 2sc1 – 8st
Round 2: Sc3, 2sc1, sc3, 2sc1 – 10st
Start off with a chain of 4. To make the oval longer or flatter, you can always start off with a much longer chain. For easier illustration, I have only done up to 4.

For step 3, in the last chain of the row, do 3 single crochet stitches into the same ch. Do 2sc1 first, then rotate in step 4, and finish off the last single crochet into the same last ch.
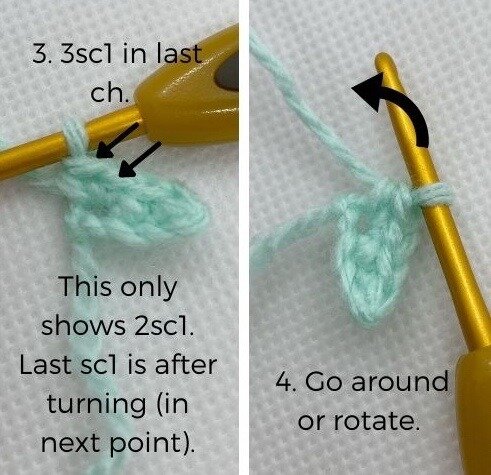
Step 5 shows the last single crochet in the 3sc1 in the last ch. Continue onto the other side of the foundation chain, as in step 6, along the direction of the arrow.

The arrows in step 7 and 8 indicate the direction of rotating the whole piece. End off the 1st round with 2sc1 as in step 7. Step 8 shows the start of the 2nd round.

Round 2: Sc3, 2sc1, sc3, 2sc1 – 10st
Steps 8 and 9 include the start of 2nd round, then 2sc1 at the bend while rotating the piece.

Step 11 continues down the row on the other side of the chain again and end off with 2sc1 in step 12.
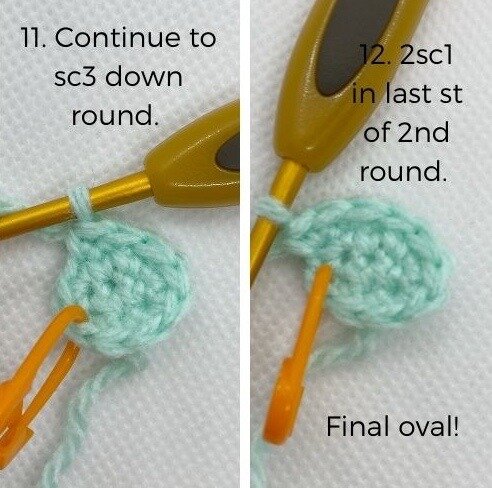
The final oval! Ok to make it a bigger oval, continue in subsequent rounds by single crocheting along the length of the sides and doing 2sc1 around the bends.

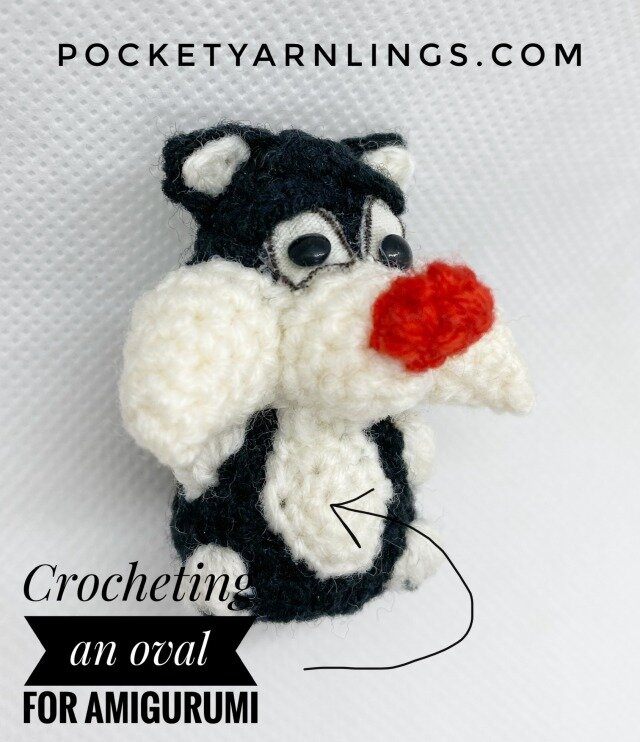
See how I used this oval method to make the bellies of my Looney Tunes characters! It is most evident for Wile Coyote over the left side, for Bugs and Sylvester, I joined up with oval with the neck region.

Hope this was useful. Mastering the oval shape is easy and as you will see in the next tutorial, an simple extension of this pattern goes into an ovoid shape. Which is essentially like a 3D oval that can be stuffed! Remember to share or pin this if you liked this tutorial.
Check out my youtube channel for even more useful videos and subscribe!
Look out for how to make ovoid shapes, up next!

Discover how easy toy design can be! The free Amigurumi Shaping Starter Guide shows you how every toy is built from simple 2D and 3D shapes — and walks you through a clear 5-step process for turning those shapes into your very own customized designs.