

Starting with Magic Ring
This is the third tutorial in my ‘Back to Basics’ series.
In the previous post on starting with Ch2 and sc, we mentioned about how to start a round with that method but we do end up with a gap in the centre.
When using the magic ring technique, you can pull the free end of the yarn taut such that the gap disappears!

To follow the steps 1-3 in making a slip knot, check out this previous post. Note that in the 1st step here when you pull the free end of yarn through centre of loop, flip the position of the ball end above the free end of yarn. (In steps 1-3 of making the slip knot, the free end originally ends up above the ball end.)
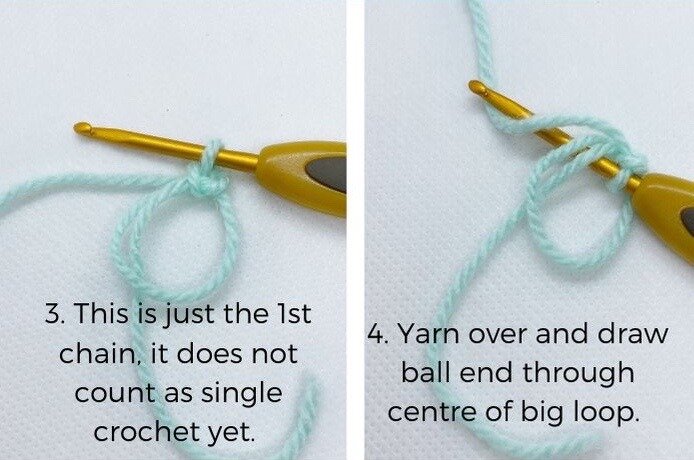
In step 3, you have only completed the 1st chain. Insert hook into the loop in the centre, yarn over and pull yarn through the centre.

At this point, you should end up with 2 loops on the hook. Then yarn over to pull yarn through 2 loops on hook.
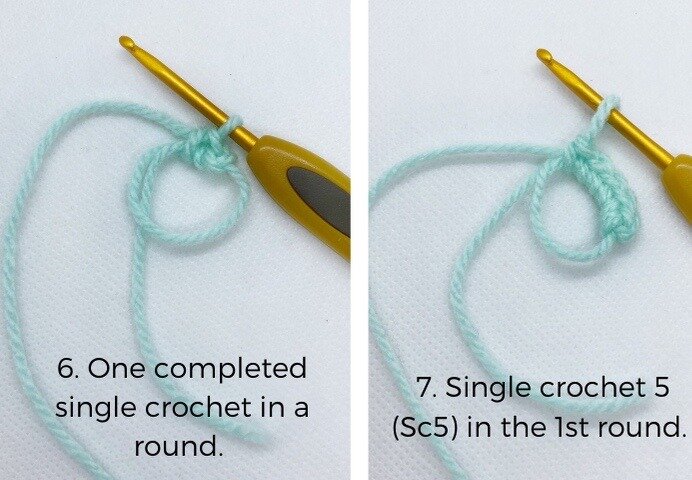
Ta-da! Your first completed Sc in a round. It’s very similar to making a single crochet in a chain but instead of inserting your hook in the next chain, you are inserting into the central loop!
Continue on single crochet to desired number of rounds, in this case I made it 5 in the round (sc5).

This is where the magic happens! After you have completed the desired number of single crochet, pull the free end of yarn taut. You should see the central loop getting smaller and smaller. If you pull till the end, the ring will completely close up!
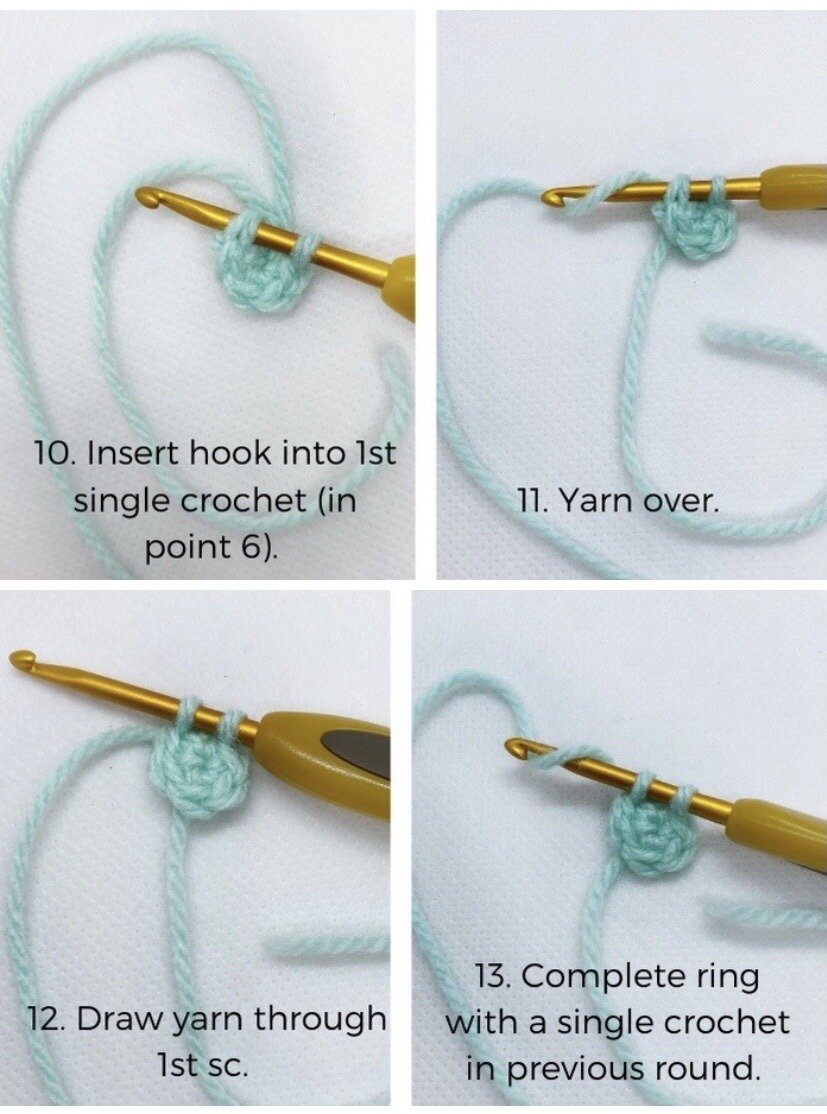
Steps 10-14 is to complete the circle. Essentially you are joining up to the beginning of the round when you first started your 1st Sc (in point 6).
Some choose to single crochet into the beginning of the round, some choose to slip stitch instead. I will be going through these 2 basic crochet stitches in the next tutorial.
In this illustration, I have inserted the hook into the 1st Sc, drawn yarn through and made a single crochet to complete the round.

After this 1st Sc of the round is formed, I usually place my stitch marker here. This is to mark the beginning of the round so that you do not lose count when you continue crocheting in the new round.
Next up will be how to do single crochet and slip stitch. It will work for whether you are doing the stitches in a straight chain or in a circle.

💡 Want to learn all the basics of crocheting amigurumi in one place?
Grab my free 77-page Amigurumi Foundation eBook — your complete step-by-step guide to mastering tools, stitches, and beginner toy techniques (normally $17!).
*There are affiliate links in this post.*