

Making bobble stitches as Amigurumi limbs

Continuous seamless stitch
Like most crocheters, I find joining up the limbs a real drag. Since I prefer to making most of my amis mini, I tend to make the limbs as part of a continuous seamless stitch when I’m crocheting the body.
Bobble stitches but this time in an ami
Doing the bobble stitch is much like if you are crocheting a textured blanket, just that this time it’s directly in the middle of the ami.
Let’s start!

Basically work into the same stitch throughout so the space can get quite tight.

Doing steps 1-5 is like doing a double crochet and keep repeating the dc process in the same stitch for a few more rounds.
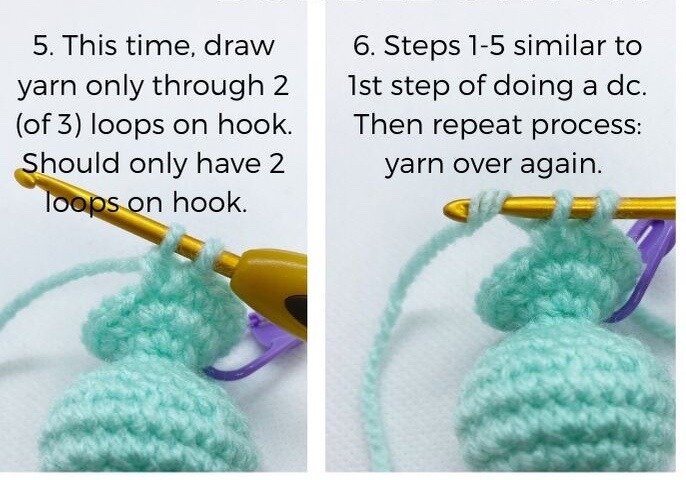
Always insert back into the same stitch but note that the number of loops on the hook will steadily increase.

After round 8, repeat steps 1-5 until you form 5 loops on the hook. You can make more depending on how ‘fat’ or wide you want the bobble stitch but generally I think a 4dc bobble stitch is just nice (number of loops will be 5 on hook).

After yarning over in step 10, pull through all 5 loops on hook such that now there is only 1 loop on hook.
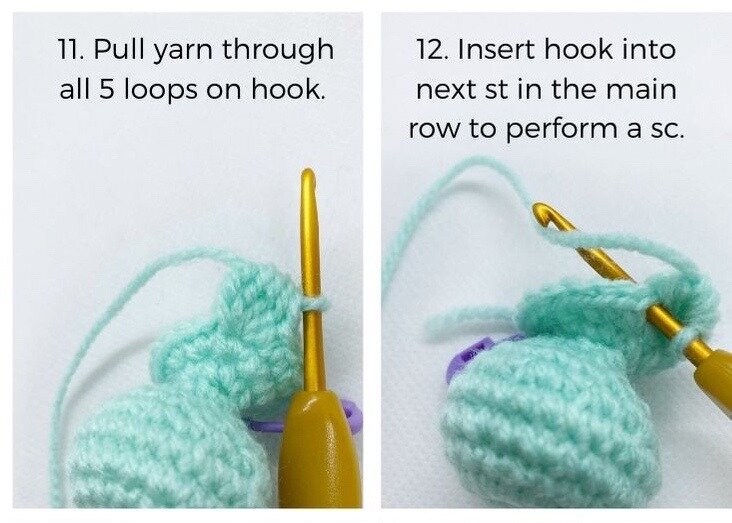
Ending step involves doing a single crochet in the stitch just after bobble stitch in the main row.
Once you have completed until step 14, the bobble stitch will be facing inwards and will look ‘recessed’.

To make the bobble stitch like a ball protruding outwards, remember to invert it out. If you stuff the body and forget to do this, it will be much harder to achieve the bulging shape later on.
There you have it, the final completed 4dc bobble stitch!

I did this for Pikachu… which is much easier actually because his body is yellow colour throughout. Later on, as you can see on the right, I decided to make the limbs extend outwards.

If you want a PDF version of the above tutorial, or how to learn mixed colour bobble stitches or even try out the ‘extended bobble stitch’, check out my free 30-page ebook with all the step by step instructions!
Or if you would like to try this simple Pikachu pattern, go check it out!
Hope this was useful!