How to Crochet a Curved Shape Using BLO and FLO (Amigurumi Bending Technique)
Learn how to crochet a subtle, controlled curve in amigurumi using BLO and FLO to guide shaping through fabric pull rather than stitch count.
Table of Contents Show
Where This Fits in Amigurumi Bends
There are a few different types of bends you can create in amigurumi:
Gentle curves (smooth, gradual shaping)
Right angle bends (90° turns)
Sharp bends (steeper, more dramatic angles)
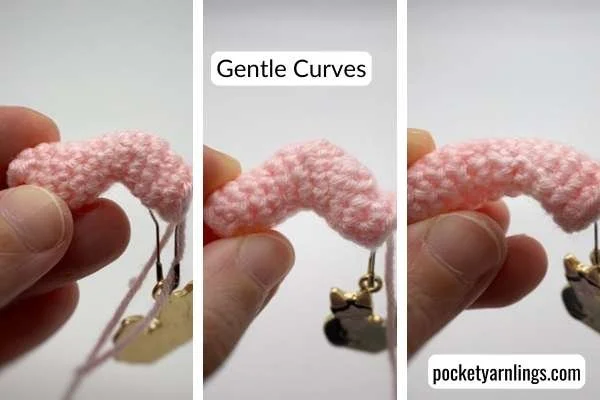
👉 In this tutorial, we’re still focusing on gentle curves.
Within gentle curves, there are different ways to control how the curve forms:
Stitch count → gradual curves
Stitch height → stronger curves
BLO/FLO → most subtle and controlled curves
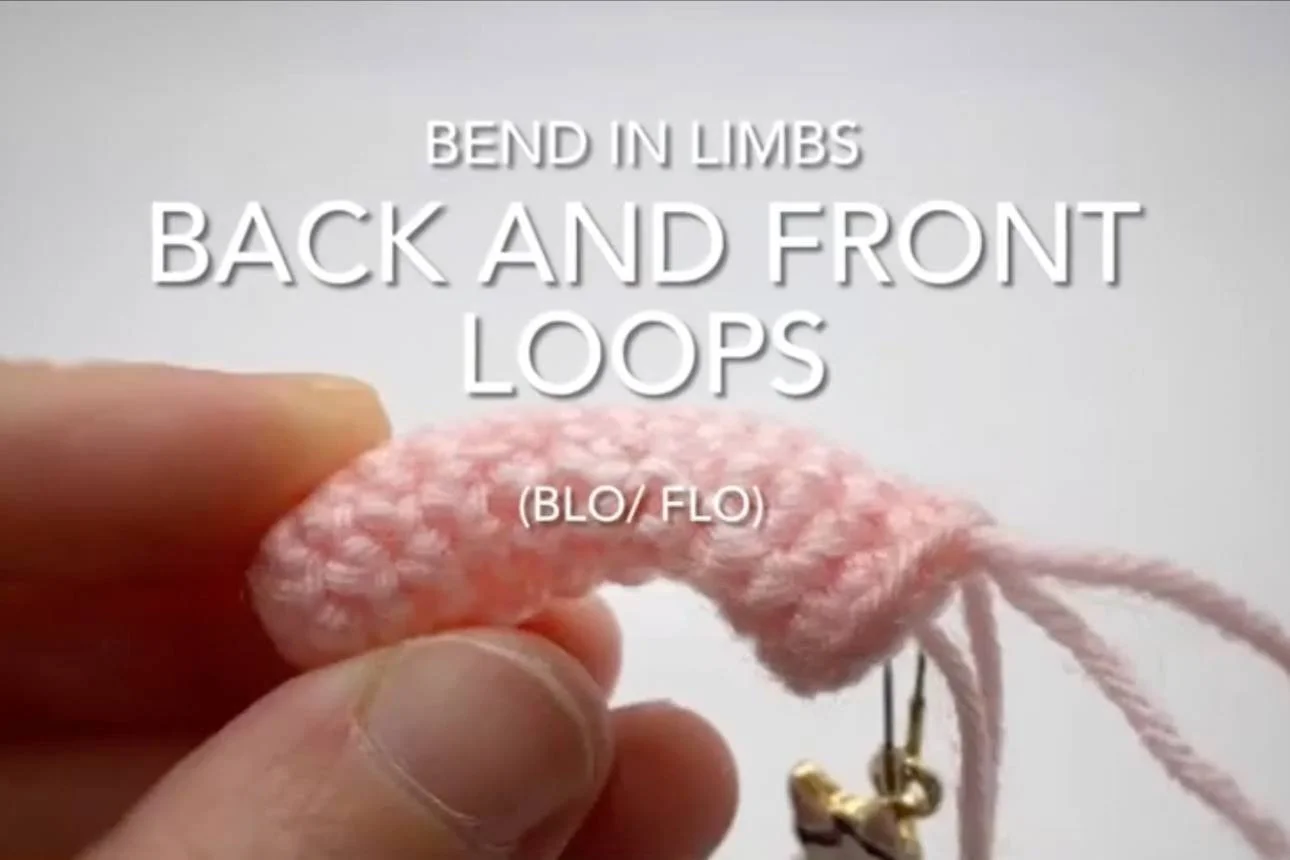
How BLO and FLO Create a Curved Shape
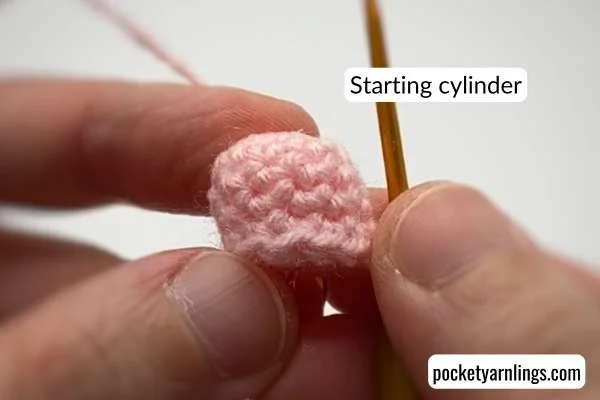
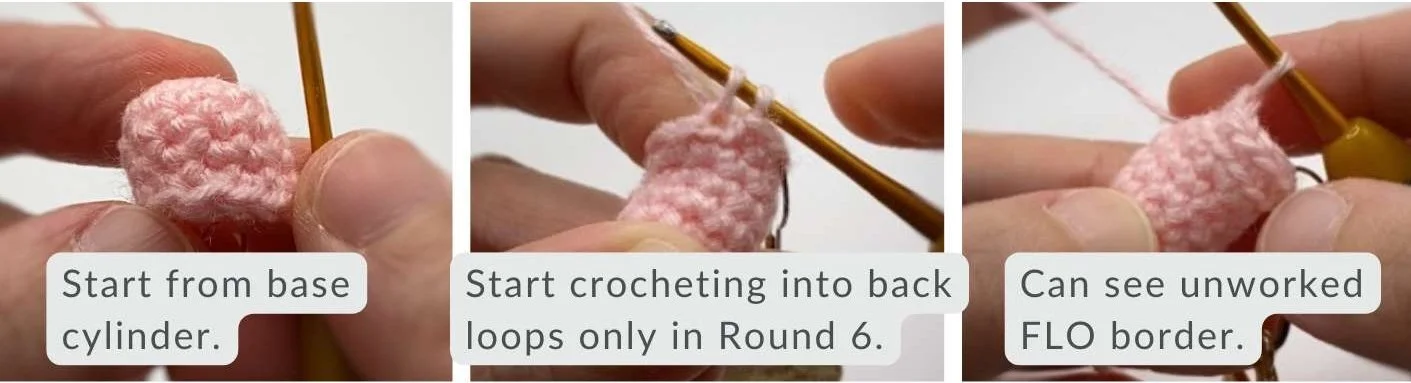
Start with a Base Cylinder
Begin with a simple crochet cylinder:
Round 1: Magic ring sc 10 – 10 sts
Round 2: Sc 10 – 10 sts
Rounds 3–5: Repeat Round 2 – 10 sts
👉 This creates a short, even tube that acts as your neutral base before shaping begins.
The Key Idea: Working Into Different Loops
Instead of changing stitch count or height, this method works by changing how the fabric folds.
BLO (back loop only) creates a ridge
FLO (front loop only) pulls the fabric inward
Alternating between them creates tension differences across the rounds
👉 This tension difference is what causes the curve to form.
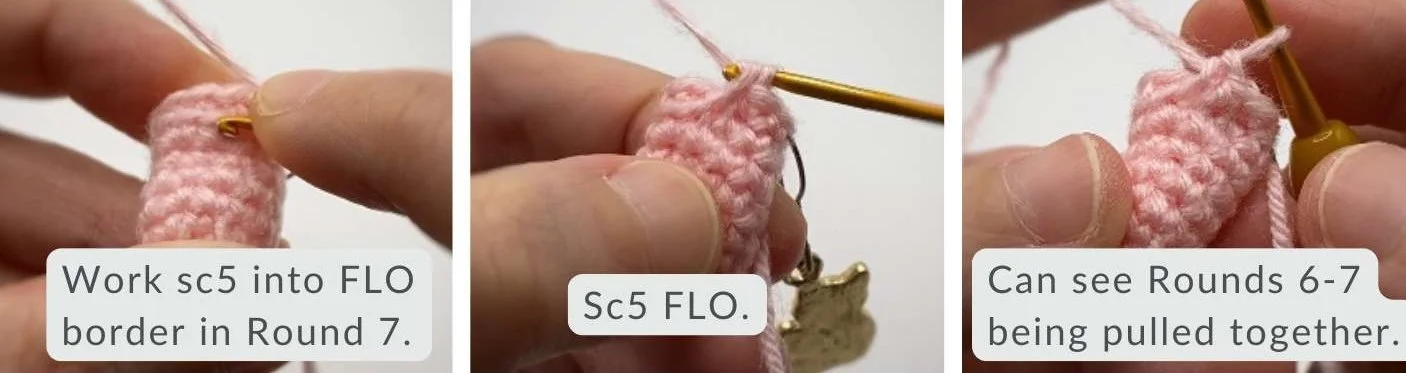
How the Curve Forms Gradually
The bend appears very subtly
It builds slowly over multiple rounds
Typically takes about 5–6 rounds to see a noticeable curve
The shaping is smoother and more controlled than stitch height methods
👉 But also less obvious — this is a gentle guiding curve, not a strong bend.
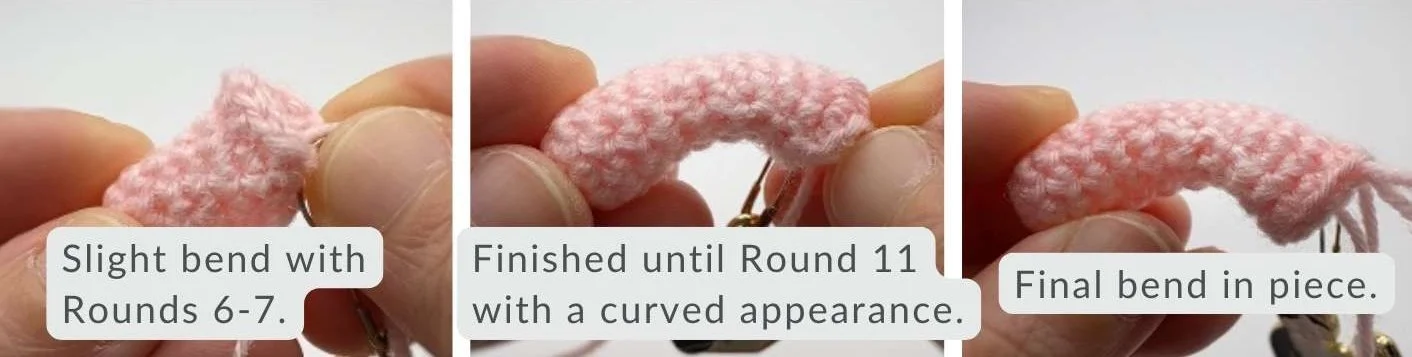
What the Finished Curve Should Look Like
A smooth, guided curve (not sharp)
Even stitch count throughout (no widening or narrowing)
No visible gaps (unlike taller stitch methods)
👉 Unlike stitch count or stitch height methods, the curve here comes from how the fabric folds — not how many stitches you add or remove.
Basic BLO and FLO Pattern for a Curved Effect
Here’s a simple example:
Pattern Snippet
Round 6: Sc2, sc5 BLO, sc3 – 10 sts
Round 7: Sc2, sc5 into FLO of previous round, sc3 – 10 sts
Round 8: Sc2, sc5 into BLO of current round, sc3 – 10 sts
Round 9: Sc2, sc5 into FLO of previous round, sc3 – 10 sts
Round 10: Sc2, sc5 into BLO of current round, sc3 – 10 sts
Round 11: Sc2, sc5 into FLO of previous round, sc3 – 10 sts
Round 12: Sc10 – 10 sts
Round 13: Repeat Round 12 – 10 sts
Watch How the Curve Forms Step-by-Step
If you prefer to see how the stitches come together, you can follow along in this video below. Notice how working into the FLO of the previous round gently pulls the cylinder into a subtle curve.
How to Control the Direction of Your Curve
This method behaves differently from other curve techniques:
The curve forms in only one direction
The shaping is uniform and consistent
It cannot be easily intensified within the same round
👉 To increase the curve, you need to repeat more rounds.
Why This Method Creates a Subtle Bend
Working into the front loop of the previous round only creates a very slight angle per round.
You are limited to the structure of the previous round
You cannot “push” the curve further within a single round
The effect builds slowly and evenly
👉 This is why the bend is subtle.
How to Adjust the Curve
To create more curvature:
You need to work more paired rounds
Each curve requires:
one BLO round
one FLO (previous round) round
👉 So the curve builds in pairs of rounds, not individually.
Example:
2 rounds → slight curve
6 rounds → more noticeable curve
more rounds → progressively stronger curve
How to Use This Technique in Amigurumi Designs
This method is best when you want subtle, polished shaping.
You can use it for:
Slight bends in limbs
Gentle arm positioning
Soft posture shaping
Subtle curves in body or neck
It’s ideal when you want shaping that looks natural and understated, rather than obvious.
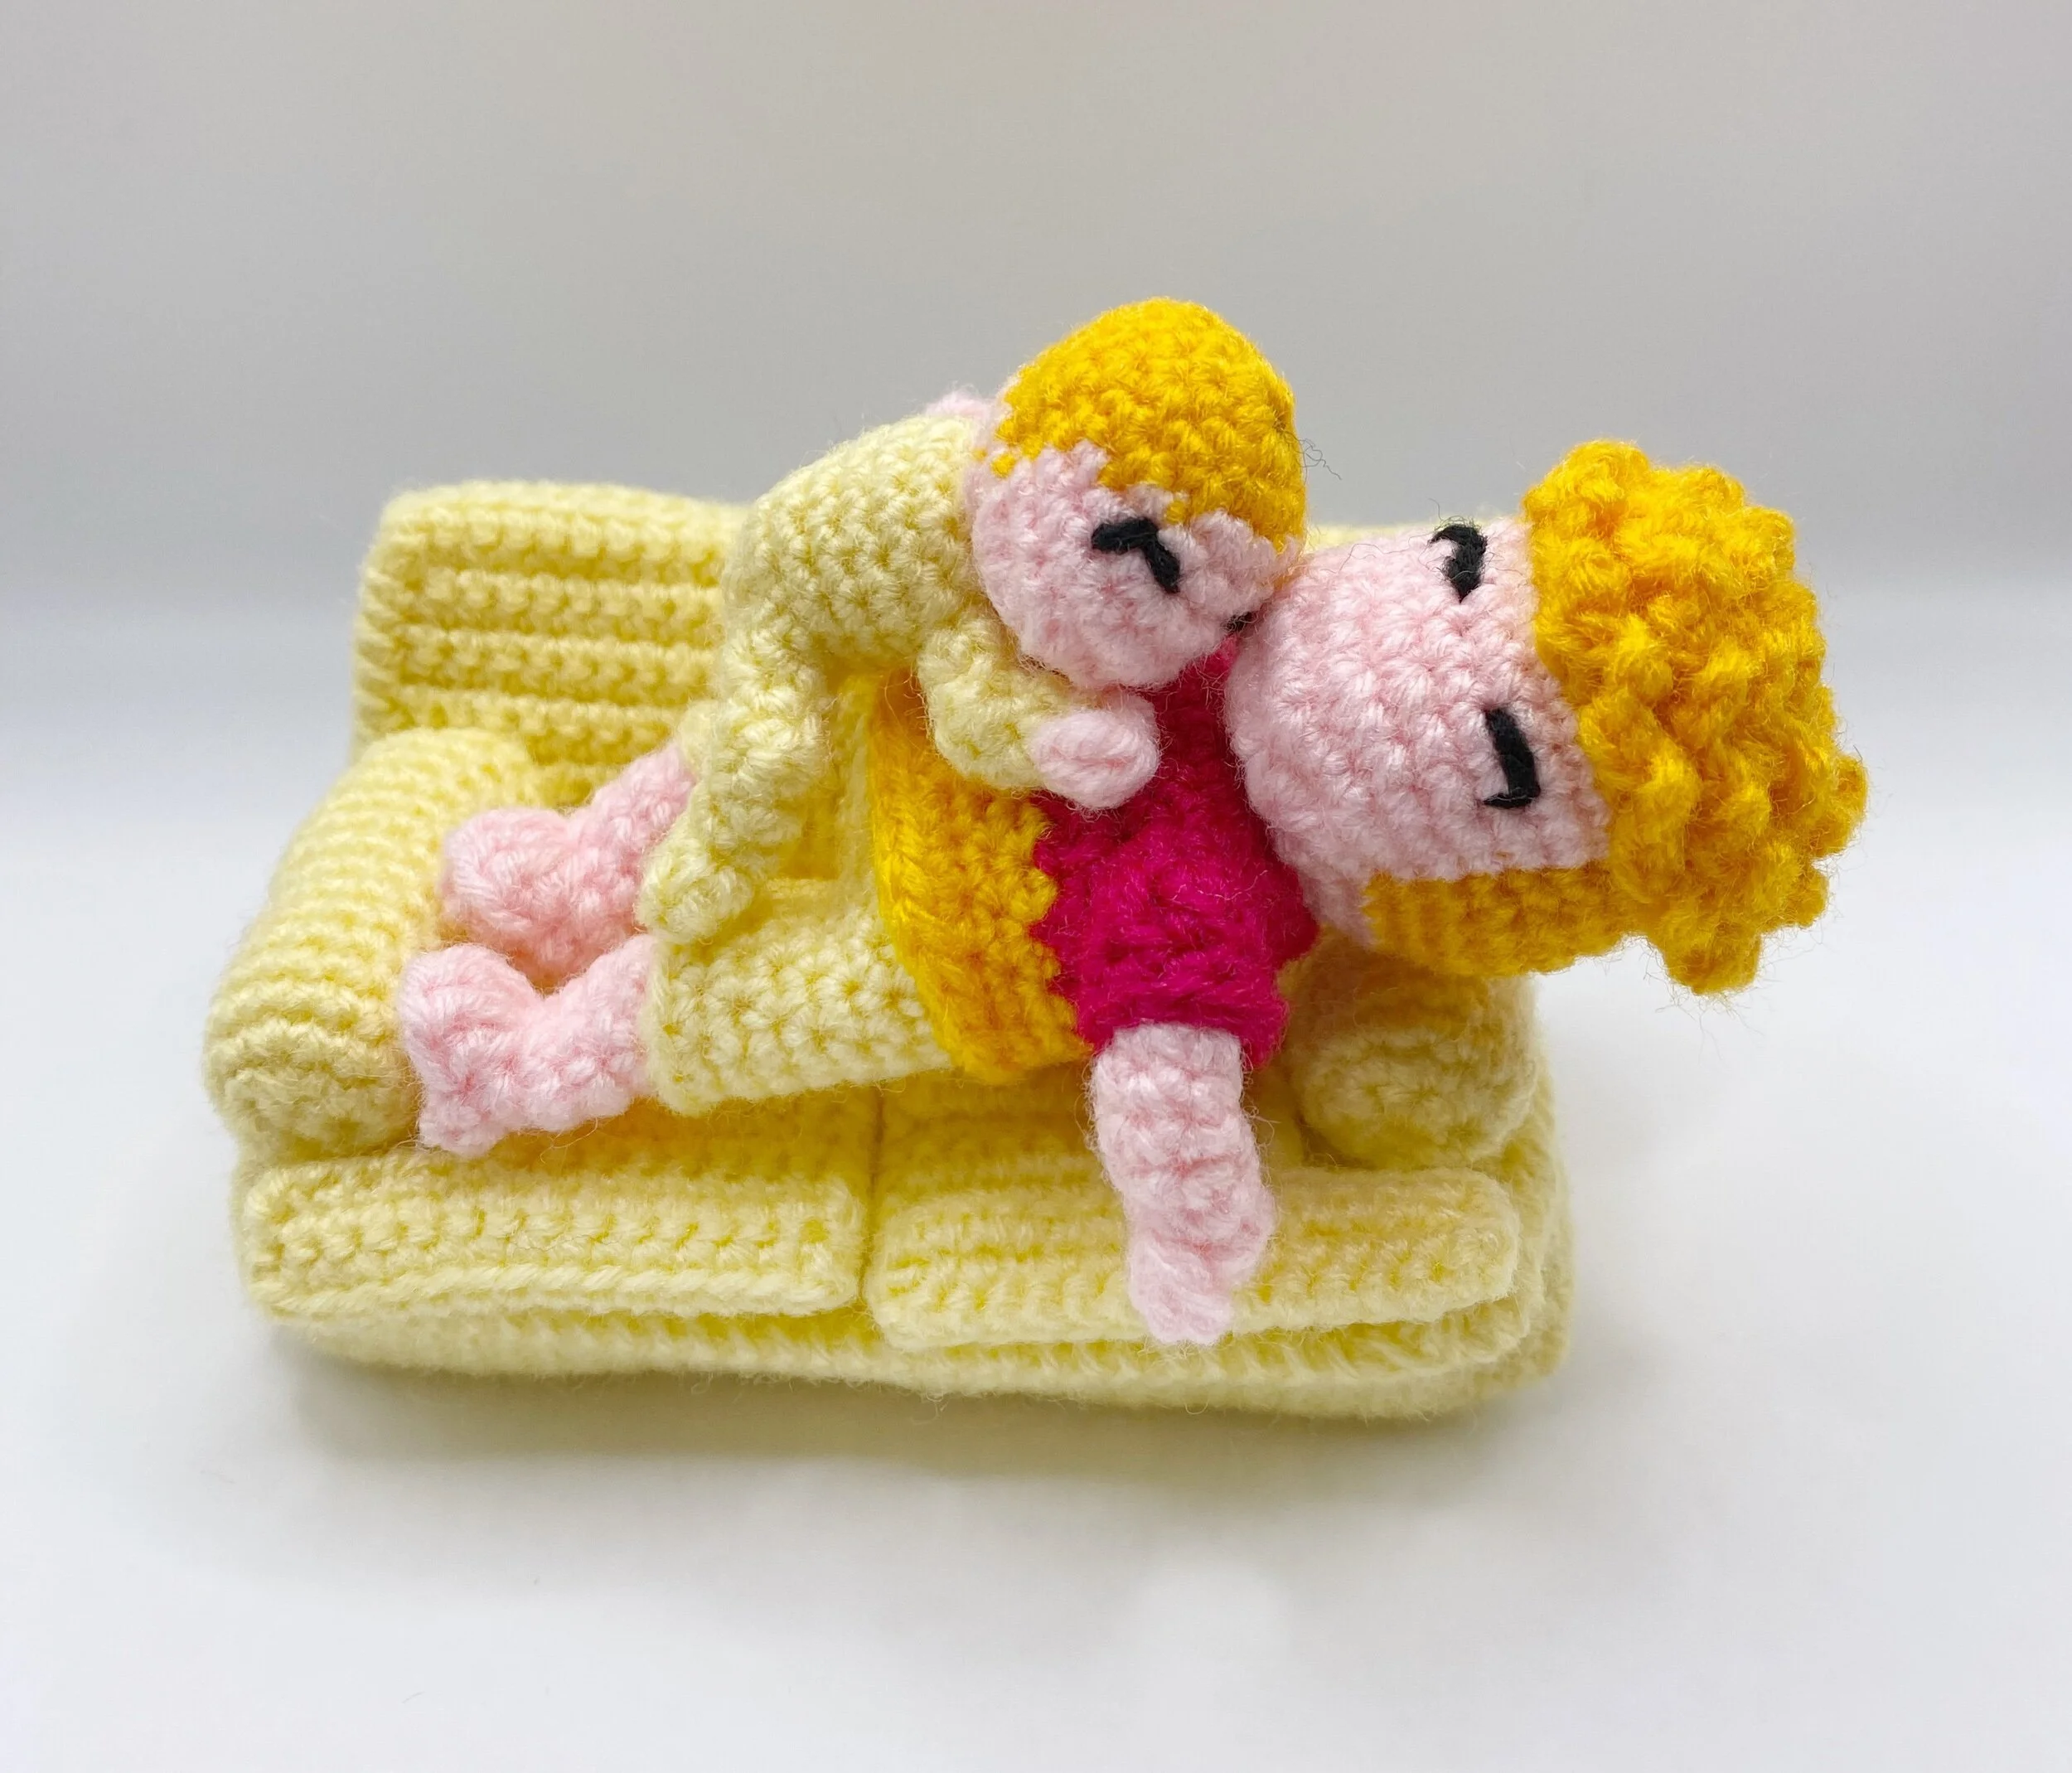
👉 For example, in my design of a father lying on a couch with a baby resting on him, the arms and knees are shaped using this method to create a slight, natural bend as he lies on his side — not a pronounced bend, but just enough to make the pose feel relaxed and realistic.
Other Ways to Create Curves in Amigurumi
If you’re looking for different effects:
BLO/FLO → subtle, controlled curves (see above)
Each method gives you a different level of shaping control.
👉 If you’d like a bigger picture of how all the bend techniques fit together, you can find them in the Ultimate Guide on How to Crochet Bends in Amigurumi (9 Ways to Shape and Control Curves).
Try Your First Amigurumi Bends
Put what you’ve learned into practice with easy arm, leg, and bend patterns. Grab it free over here.
Want to Explore More Types of Bends?
This BLO/FLO method is just one way to create gentle curves.
There are also:
gradual bends
perpendicular bends
steep and split bends
👉 Each technique creates a different effect depending on how you shape your stitches.