
How to Crochet a Steep Uneven Bend in Amigurumi (Asymmetrical Split Method)
Learn how to crochet a steep, uneven bend in amigurumi by splitting the structure asymmetrically to create directional and expressive shaping.
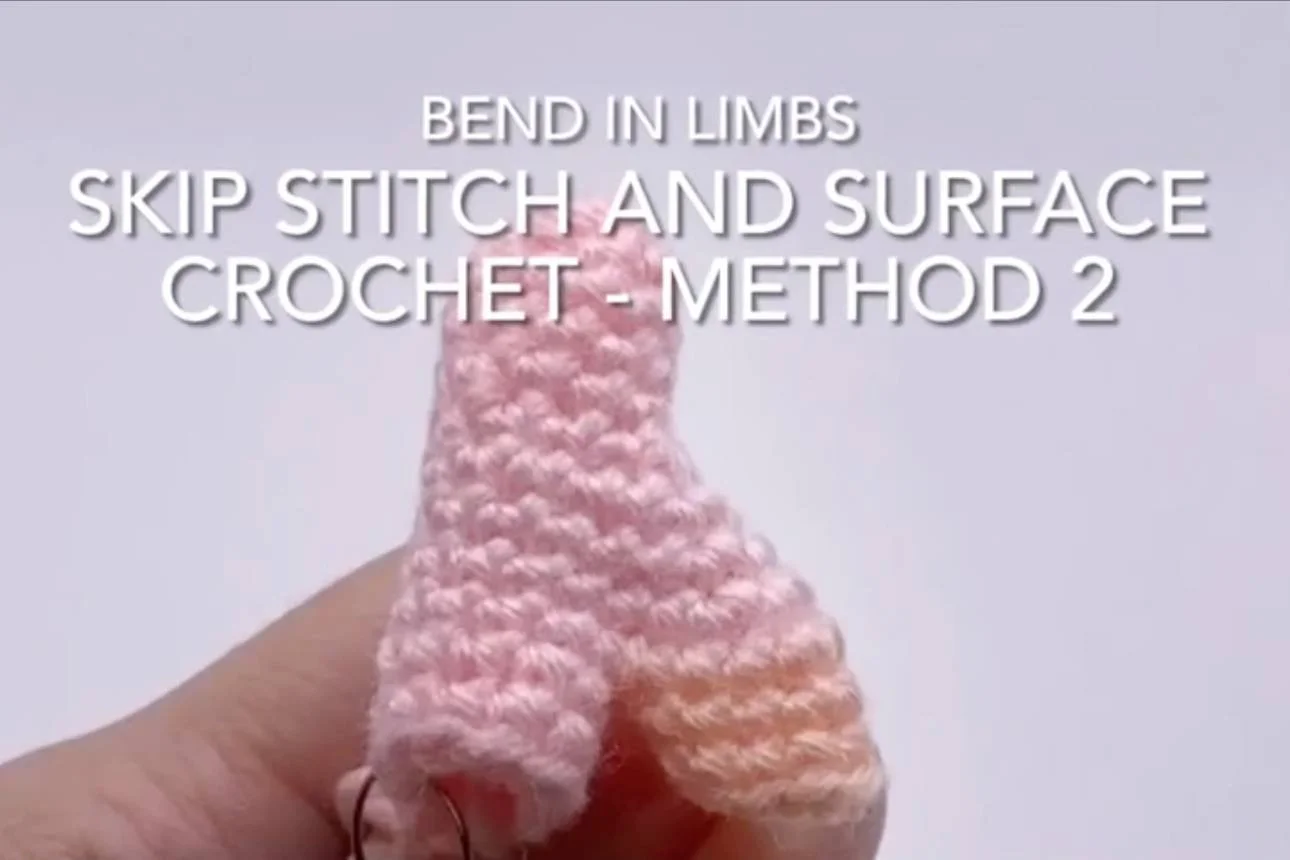
Table of Contents Show
Where This Fits in Amigurumi Bends
There are a few different types of bends you can create in amigurumi:
Gentle curves (smooth, gradual shaping)
Right angle bends (90° turns)
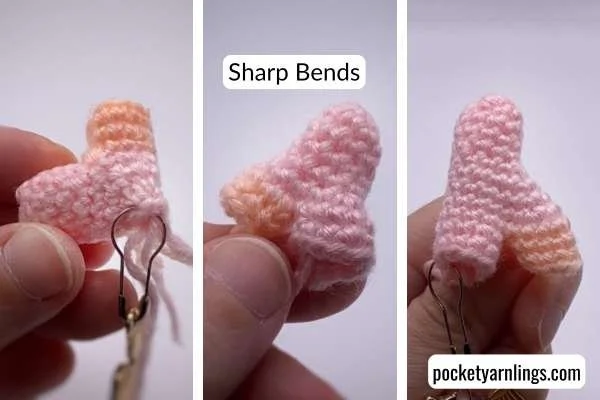
Sharp bends (steeper, more dramatic angles)
👉 In this tutorial, we’re focusing on sharp and steeper bends, using branching techniques to create an asymmetrical, directional bend.
How Skip Stitches and Surface Crochet Create a Steep Uneven Bend
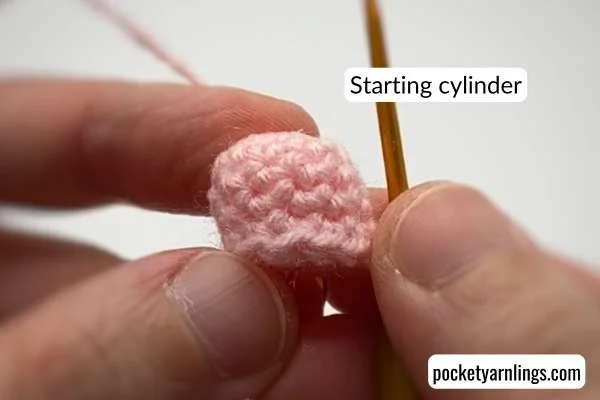
Start with a Base Cylinder
Begin with a simple crochet cylinder:
Round 1: Magic ring sc 10 – 10 sts
Round 2: Sc 10 – 10 sts
Rounds 3–5: Repeat Round 2 – 10 sts
👉 This forms your neutral base before shaping begins.
The Key Idea: Split the Structure Unevenly
Increases create imbalance
Skip stitches create separation
One side extends more than the other
👉 Unlike symmetrical methods, this technique intentionally creates imbalance to control direction.
Rebuild the Second Side with Surface Crochet
Attach new yarn
Rebuild the structure on the opposite side
Follow the uneven positioning
👉 This reinforces the asymmetry and stabilises the shape.
What the Finished Bend Should Look Like
A steep bend
An uneven split
Clear directional movement
More dynamic than all previous methods
👉 This creates one of the most expressive bend types, allowing your amigurumi to take on more natural or stylised poses.
Basic Pattern for a Steep Uneven Bend
Here’s a simplified example:
Pattern Snippet
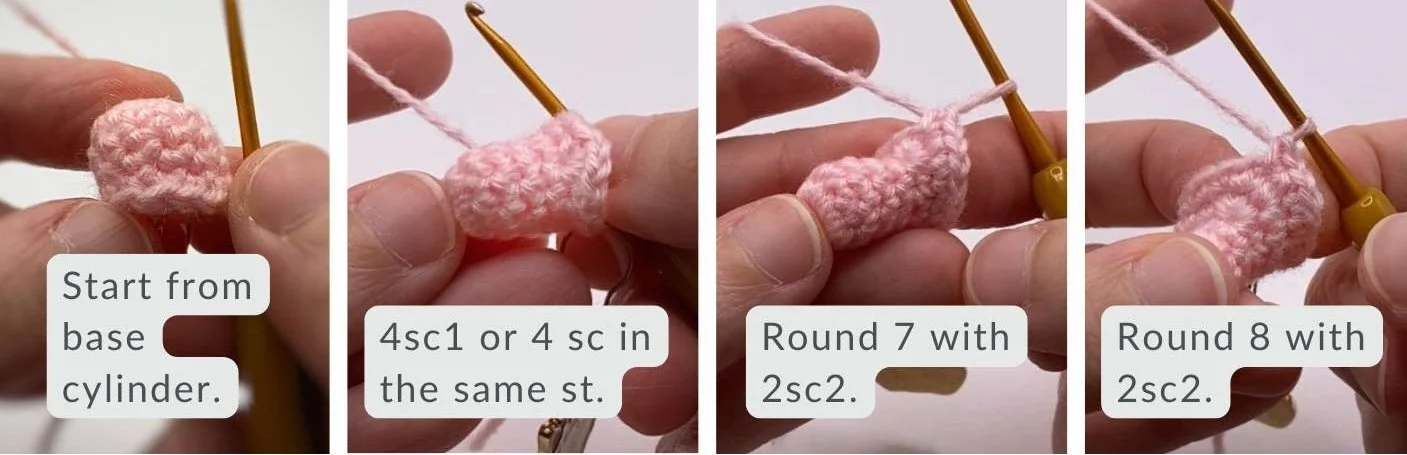
Round 6: Sc3, 4sc in next st, sc6 – 13 sts
Round 7: Sc4, 2sc in next 2 sts, sc7 – 15 sts
Round 8: Sc5, 2sc in next 2 sts, sc8 – 17 sts
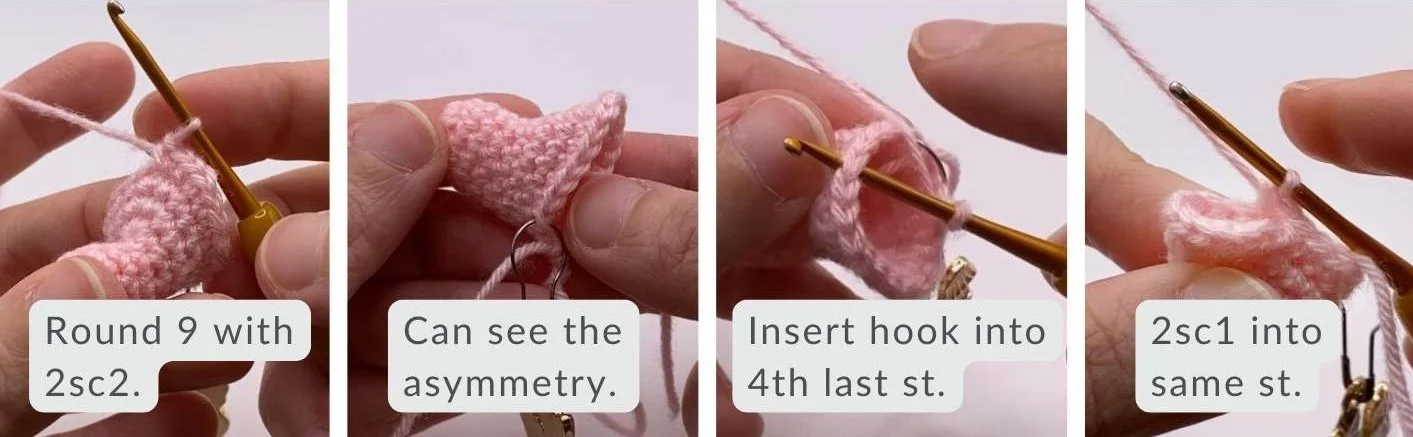
Round 9: Sc6, 2sc in next 2 sts, sc9 – 19 sts
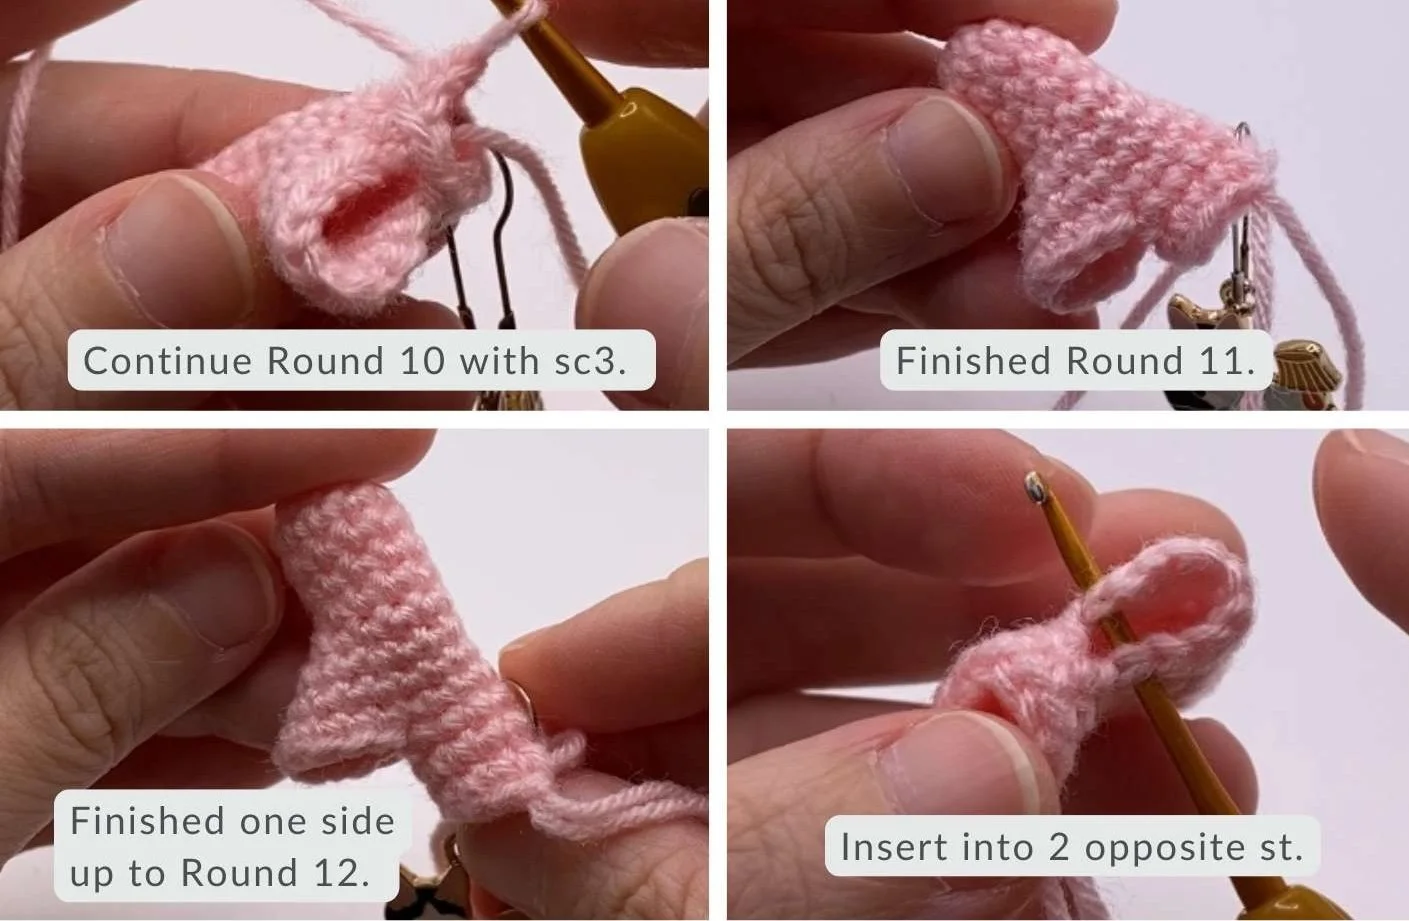
Round 10: Sc5, insert hook into 4th last st, (sc2tog, sc1), sc3 – 10 sts
Round 11: Sc10 – 10 sts
Round 12: Repeat Round 11 – 10 sts
One side is now formed.
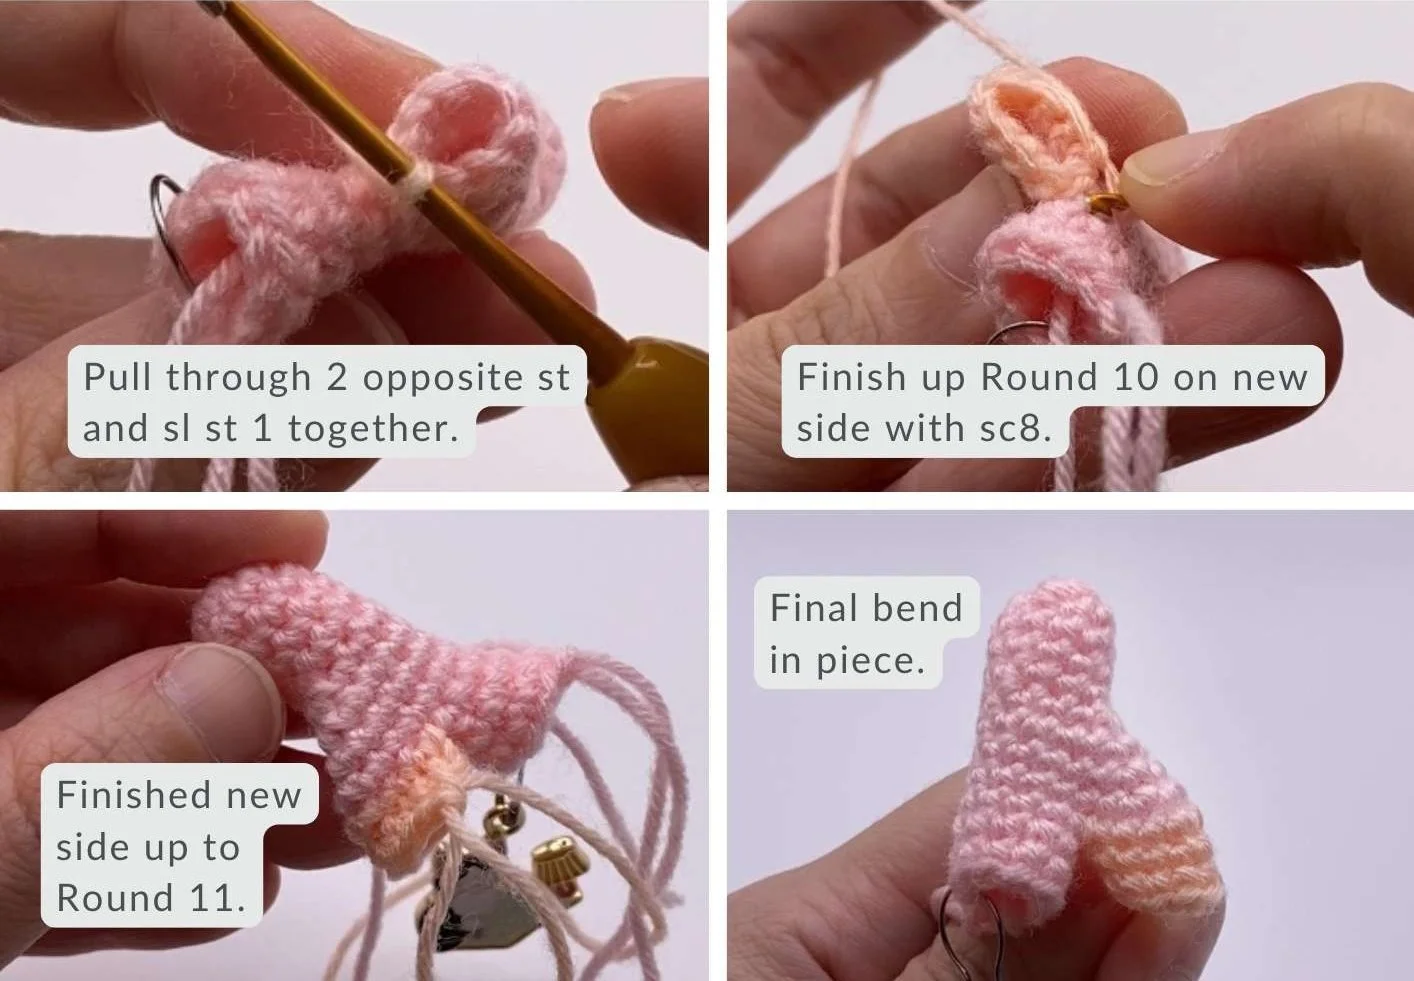
Using new yarn to create the second side at the same level:
Round 10: Insert into 2 opposite sts, (sl st 2 together, sc1), sc8 – 10 sts
Round 11: Sc10 – 10 sts
Round 12: Repeat Round 11 – 10 sts
Watch How the Bend Forms Step-by-Step
If you prefer to see how the stitches come together, you can follow along in this video below. Notice how the uneven increases and split create a directional bend, and how surface crochet stabilises the structure.
How to Control the Direction and Shape
Why This Method Creates a Steep Uneven Bend
Asymmetrical increases build imbalance
Structural separation creates a split
Surface crochet locks the shape
👉 This combination creates a bend that is both steep and directional.
How to Adjust the Direction
You can control the direction by adjusting:
More increases on one side → stronger extension
Placement of increases → controls tilt
👉 Small adjustments can significantly change how the final shape moves.
How to Use This Technique in Amigurumi Designs
This technique is ideal when you want your amigurumi to feel expressive and dynamic.
You can use it for:
Legs from the body (natural stance)
Arms with movement
Head tilts or posture
Stylised or expressive shapes
👉 It’s perfect when the shape needs to feel alive and directional, rather than balanced.
Other Ways to Create Steep Bends in Amigurumi
There are a few different ways to create steep bends:
Symmetrical split → balanced, even structure
Asymmetrical split → directional, expressive shaping
This method builds on the symmetrical split by introducing controlled imbalance for more natural movement.
👉 If you’d like a bigger picture of how all the bend techniques fit together, you can find them in the Ultimate Guide on How to Crochet Bends in Amigurumi (9 Ways to Shape and Control Curves).
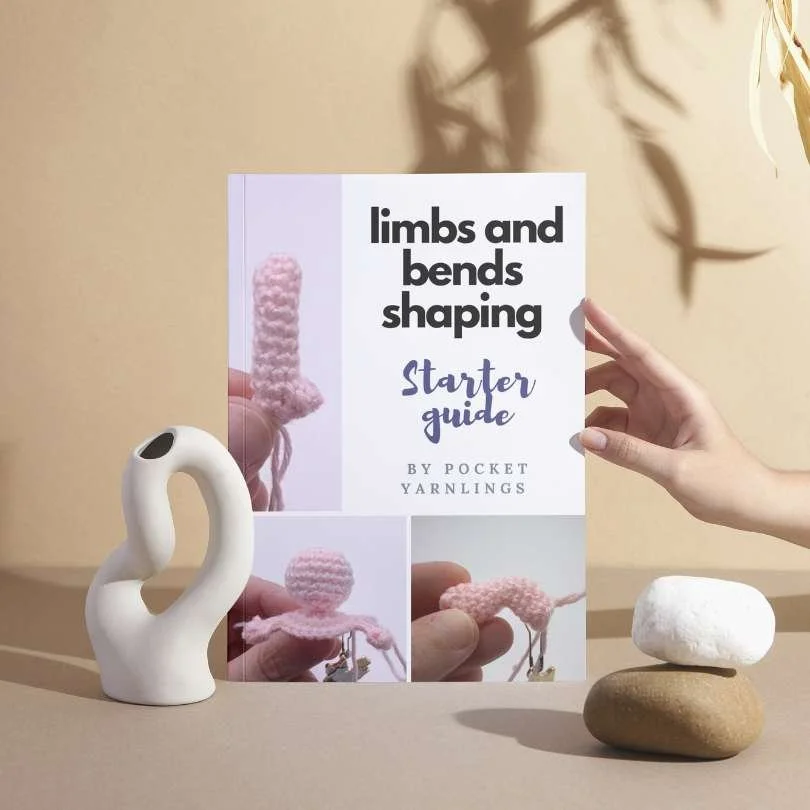
Try Your First Amigurumi Bends
Put what you’ve learned into practice with easy arm, leg, and bend patterns. Grab it free over here.
Want to Explore More Types of Bends?
This asymmetrical split method is just one way to create steep, expressive bends.
There are also:
gradual bends
perpendicular bends
structured and directional bends
👉 Each technique creates a different effect depending on how you shape and structure your stitches.